Xamarin Challenge Part 1
Overview
One of the key challenges in developing mobile applications for multiple devices and platforms is the divergent set of tools, languages, and resources required to develop and maintain features and functionality across a variety of programming languages, APIs, and user-interface paradigms.
Xamarin offers one solution to the problem by allowing apps to be written in C# for iOS, Android, and Windows using a common API based on Microsoft .NET. Xamarin apps are built with native user interface controls. Apps look and act the way a user expects for a given device and platform. Xamarin apps also have access to the full spectrum of functionality exposed by the underlying operating system and device and are compiled into native binaries for performance.
Xamarin Forms is a framework included with Xamarin that allows developers to create cross-platform user interfaces by defining those interfaces in XAML. Controls and UI elements declared in XAML render native controls for the host platform, so iOS users see iOS controls and Android users see Android controls. Whereas classic Xamarin apps share code but not UI, Xamarin Forms apps share code and UI and are frequently able to share 95% of their source code across platforms.
Visual Studio 2017 provides seamless support for Xamarin and Xamarin Forms so you can build cutting-edge mobile apps for a variety of platforms using a single set of tools and APIs. In this challenge, you will use Visual Studio 2017 to create a Xamarin Forms weather application that pulls data from a live weather service and displays current weather conditions for cities around the world. In subsequent challenges, you will build upon what you created here to expand the app's features and capabilities.
Objectives
In this challenge, you will learn how to:
- Create a Xamarin Forms solution targeting Android, iOS, and Windows
- Add native image and package assets to Xamarin Forms projects
- Add common logic written in C# to Xamarin Forms projects
- Build XAML user interfaces for Xamarin Forms projects
Your feedback is important. If you run into issues while working the exercises in this challenge, please contact us at xamarinchallengehelp@microsoft.com.
Prerequisites
The following are required to complete this challenge:
If you wish to build and run the iOS version of the challenge app, you also have to have a Mac running OS X 10.11 or higher, and both the Mac and the PC running Visual Studio 2017 require further configuration. For details, see https://developer.xamarin.com/guides/ios/getting_started/installation/windows/.
Having a Mac and connecting it to Visual Studio is only required if you wish to build and run the iOS version of the app. You can run the Android and Windows versions of the app without any further configuration.
Exercises
This challenge includes the following exercises:
Estimated time to complete this challenge: 45 minutes.
Exercise 1: Configure Visual Studio 2017 for Xamarin Development
If Visual Studio 2017 is already installed on your computer, it's important to make sure it is configured with the proper components and workloads to support Xamarin development. If it isn't installed, then you need to install it with the proper workloads. You can install the Community edition, which is free, or any other edition that you would like. The Community edition and other editions of Visual Studio 2017 can be downloaded from https://www.visualstudio.com/vs/.
If Visual Studio is already installed, you can determine which components and workloads are installed by starting the Visual Studio installer. (An easy way to do that is to press the Windows key, type "installer," and select Visual Studio Installer from the menu. You can then click the Modify button to view a list of installed components.) If you are installing Visual Studio for the first time, the same UI allows you to select the component and workloads to installed. Here is what must be installed for you to complete this challenge and subsequent challenges.
-
Under "Workloads" in the Visual Studio installer, make sure Universal Windows Platform development and .NET desktop development are checked.
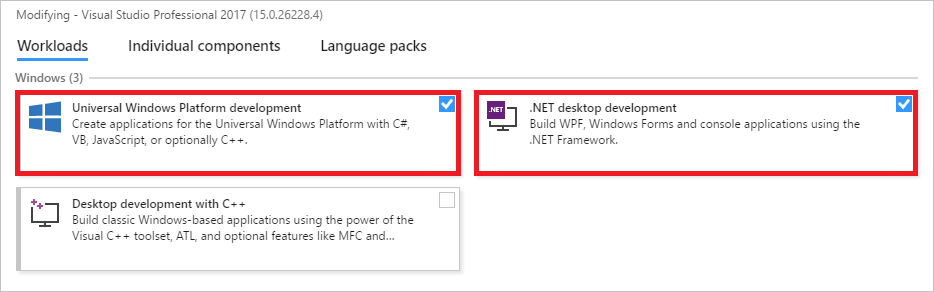
Installing the UWP and .NET development workloads
-
Under "Workloads" in the Visual Studio installer, make sure Mobile development with .NET is checked.
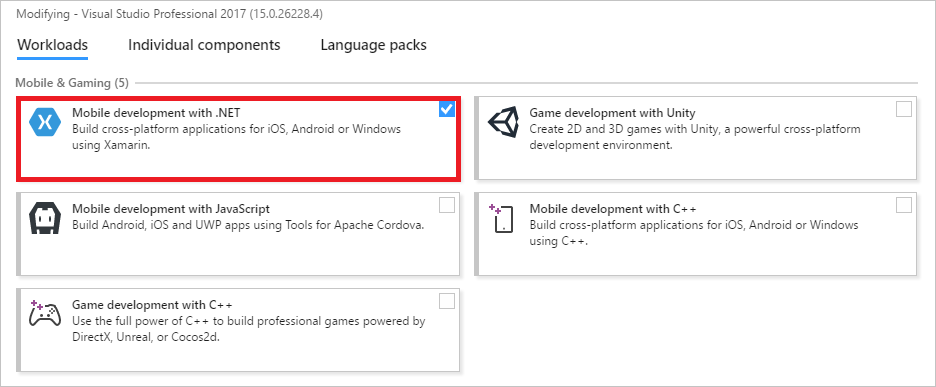
Installing the mobile development workload
-
Under "Individual Components" in the Visual Studio installer, make sure Visual Studio Emulator for Android and Windows 10 Mobile Emulator (Anniversary Edition) are checked.
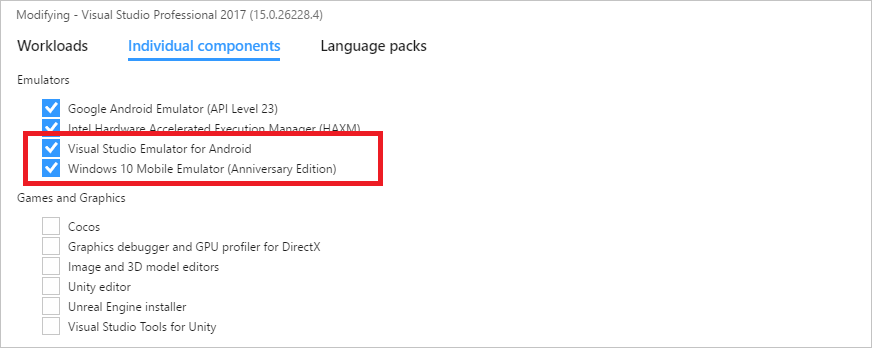
Installing emulators
Once these workloads and components are installed, you can begin creating Xamarin Forms apps.
Exercise 2: Create a Xamarin Forms solution targeting Android, iOS, and Windows
The first step in creating a cross-platform solution with Xamarin Forms is to provision a solution based on the Visual Studio 2017 Cross Platform App template. In this exercise, you will create a new Xamarin Forms solution using this template.
-
Start Visual Studio 2017. Then click File > New > Project and create a new Cross Platform App solution named "CoolBreeze."
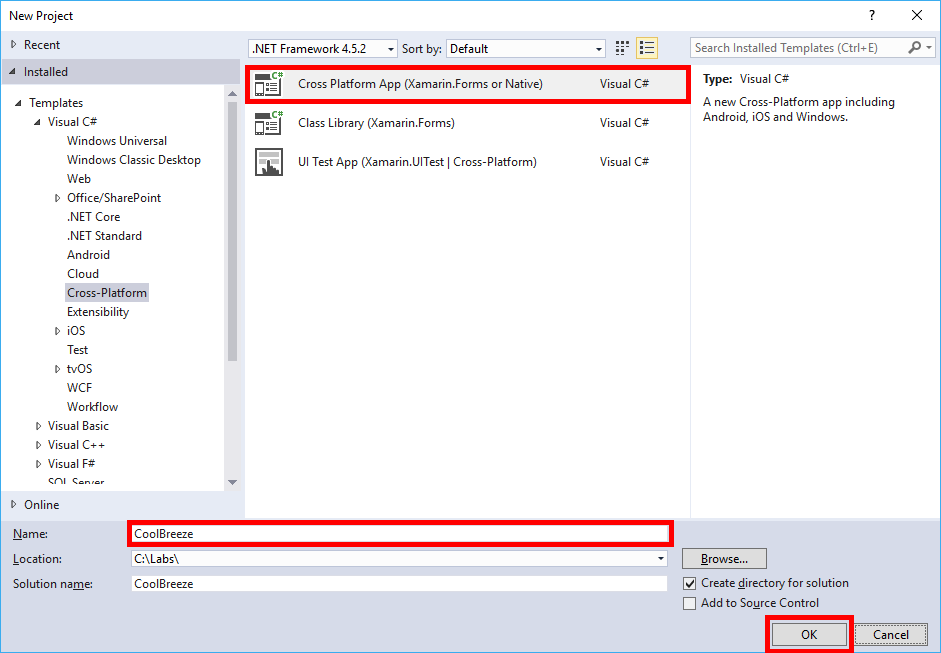
Creating a new Cross Platform App solution
-
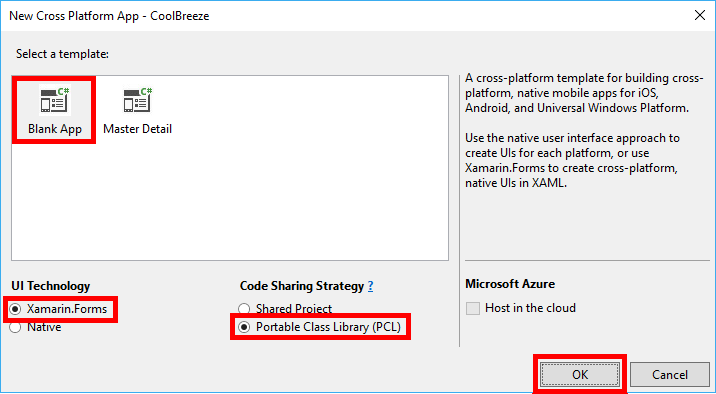
In the "New Cross Platform App" dialog, select the Blank App template. Make sure Xamarin.Forms is selected under "UI Technology" and select Portable Class Library (PCL) as the "Code Sharing Strategy." Then click OK.
Specifying Cross Platform App preferences
-
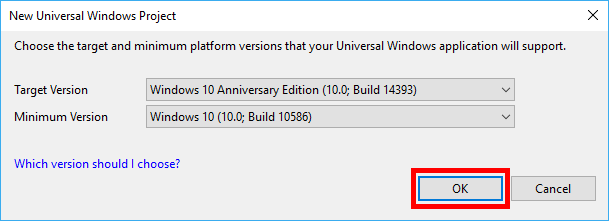
When prompted to choose platform requirements for the Universal Windows Platform project, accept the defaults and click OK.
Specifying UWP platform versions
-
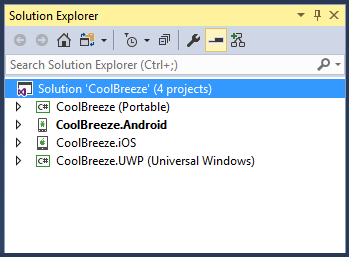
Confirm that the solution appears in Solution Explorer and that it contains four projects:
- CoolBreeze (Portable) - Contains shared logic for your Xamarin Forms app
- CoolBreeze.Android - Contains assets, resources, and logic specific to Android
- CoolBreeze.iOS - Contains assets, resources, and logic specific to iOS
- CoolBreeze.UWP (Universal Windows) - Contains assets, resources, and logic specific to the Universal Windows Platform (UWP)
The generated solution
-
Right-click the CoolBreeze.Android project in Solution Explorer and select Properties from the context menu. Then click Android Options and uncheck the Use Fast Deployment (debug mode only) box. This option, if enabled, sometimes causes problems with Android emulators in Hyper-V.

Disabling fast deployment on Android
-
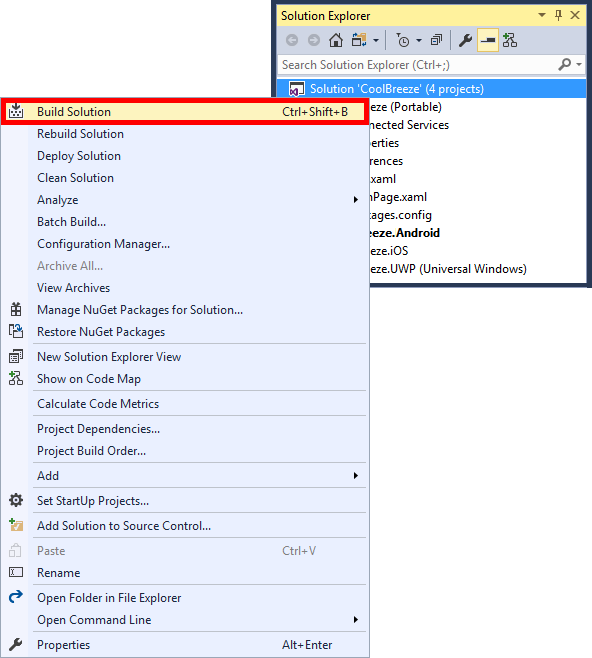
In Solution Explorer, right-click the CoolBreeze solution and select Build Solution to build the solution. Confirm that the solution builds without errors.
Building the CoolBreeze solution
Your Xamarin Forms solution has now been provisioned and configured, and you're ready to start adding platform-specific image and package assets to the projects.
Exercise 3: Add image and package assets
The next step in building your Xamarin Forms app is to add shared and platform-specific images and other assets to the individual projects based on recommended standards for each platform. Each mobile platform requires images and assets to be located and configured in a specific way. In this exercise, you will add images and assets to the Portable, Android, iOS and Windows projects.
-
In Solution Explorer, right-click the CoolBreeze (Portable) project and use the Add > New Folder command to add a folder named "Images" to the project. Confirm that the "Images" folder appears in Solution Explorer in the CoolBreeze (Portable) project.

The new Images folder
-
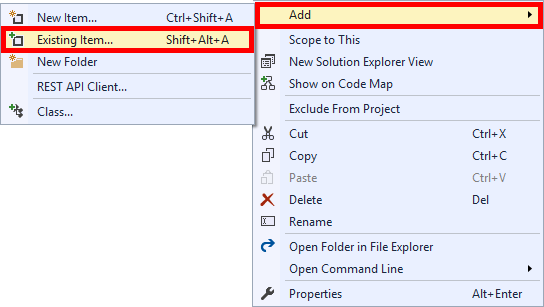
Right-click the "Images" folder and select Add > Existing Item.... Then browse to the "Resources\Portable\Images" folder in the zip file containing this challenge.
Adding images to the PCL project
-
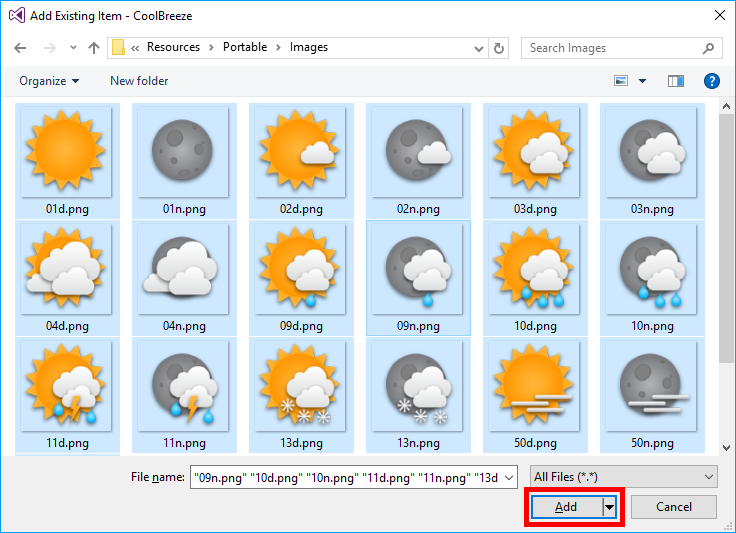
Select all of the files in the zip file's "Resources\Portable\Images" folder, and then click Add.
Adding images to the PCL project
-
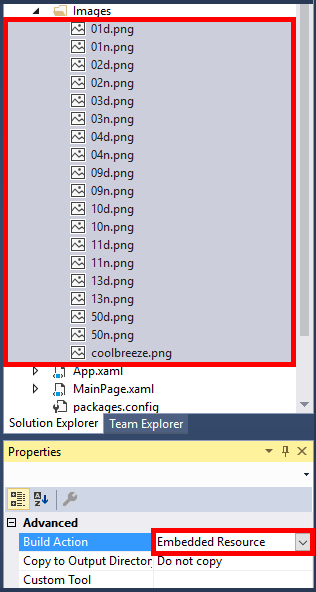
In Solution Explorer, expand the "Images" folder to view all of the images that you added. Select all of those images. Then go to the "Properties" pane and change the "Build Action" from Content to Embedded Resource. These images will now be accessible on all platforms.
Updating the build action
-
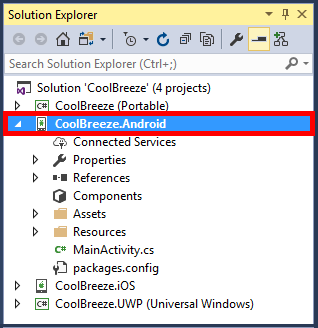
In Solution Explorer, expand the CoolBreeze.Android project to view Android-specific assets and resources.
Expanding the Android project
-
Open a Windows File Explorer window and navigate to the "Resources\Droid\Resources" folder in the zip file containing this challenge. Copy all of the subfolders in the "Resources\Droid\Resources" folder to the clipboard. Then return to Solution Explorer, right-click the "Resources" folder in the CoolBreeze.Android project, and select Paste to paste the contents of the clipboard into the project.
-
In the subsequent "Merge Folders" dialog, check Apply to all items and then click Yes.

Merging folders
-
In the "Destination File Exists" dialog, again check Apply to all items and then click Yes. This will update your Android images and assets with appropriately branded assets for your app.
Overwriting existing resources
-
In Solution Explorer, expand the CoolBreeze.iOS project to view iOS-specific assets and resources.
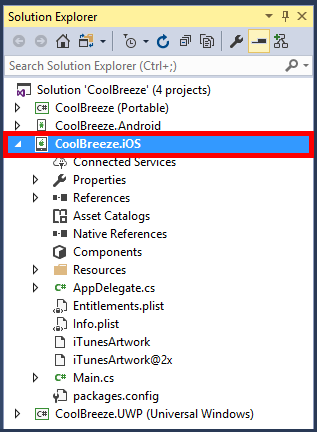
Expanding the iOS project
-
Right-click the project's "Resources" folder and select Add > Existing Item.... Then browse to the "Resources\iOS\Resources" folder in the zip file containing this challenge, select all of the files in the folder, and click Add.
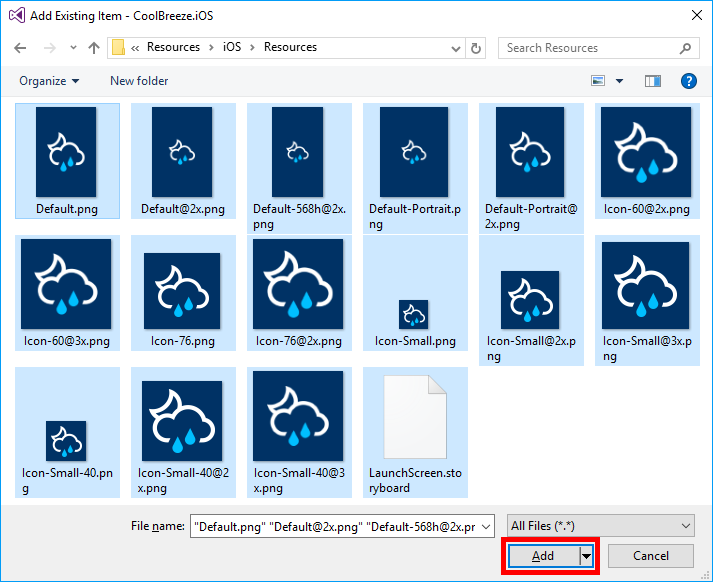
Adding images to the iOS project
-
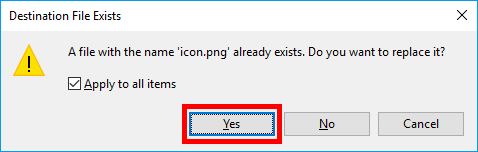
In the "Destination File Exists" dialog, check Apply to all items and then click Yes. This will update your iOS images and assets with appropriately branded assets for your app.
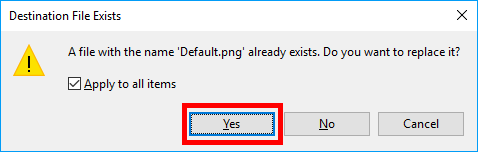
Overwriting existing resources
-
In Solution Explorer, expand the CoolBreeze.UWP (Windows Universal) project to view Windows-specific assets and resources.
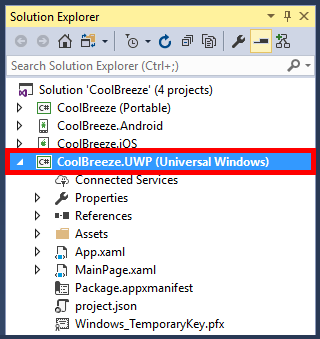
Expanding the UWP project
-
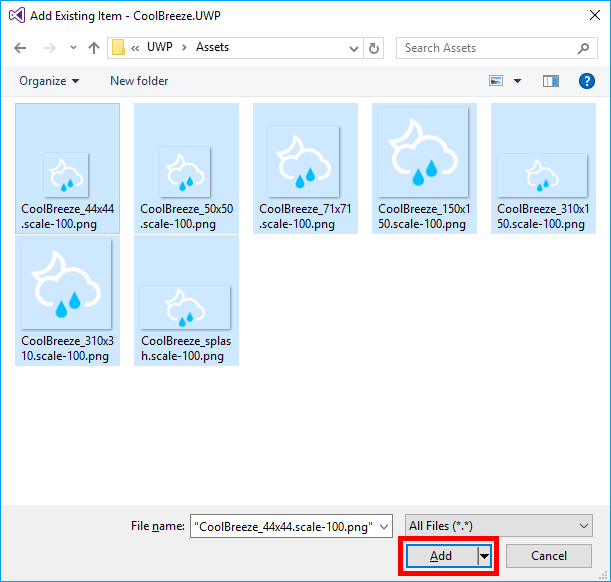
Right-click the project's "Assets" folder and select Add > Existing Item.... Then browse to the "Resources\UWP\Assets" folder in the zip file containing this challenge, select all of the files in the folder, and click Add.
Adding images to the Windows project
-
In Solution Explorer, right-click Package.appxmanifest in the UWP project and select View Code.
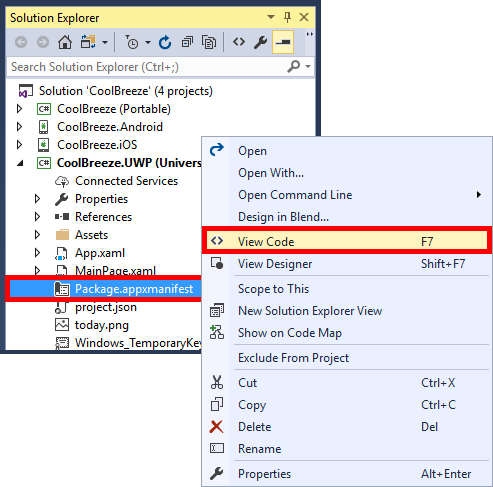
Opening the UWP package manifest
-
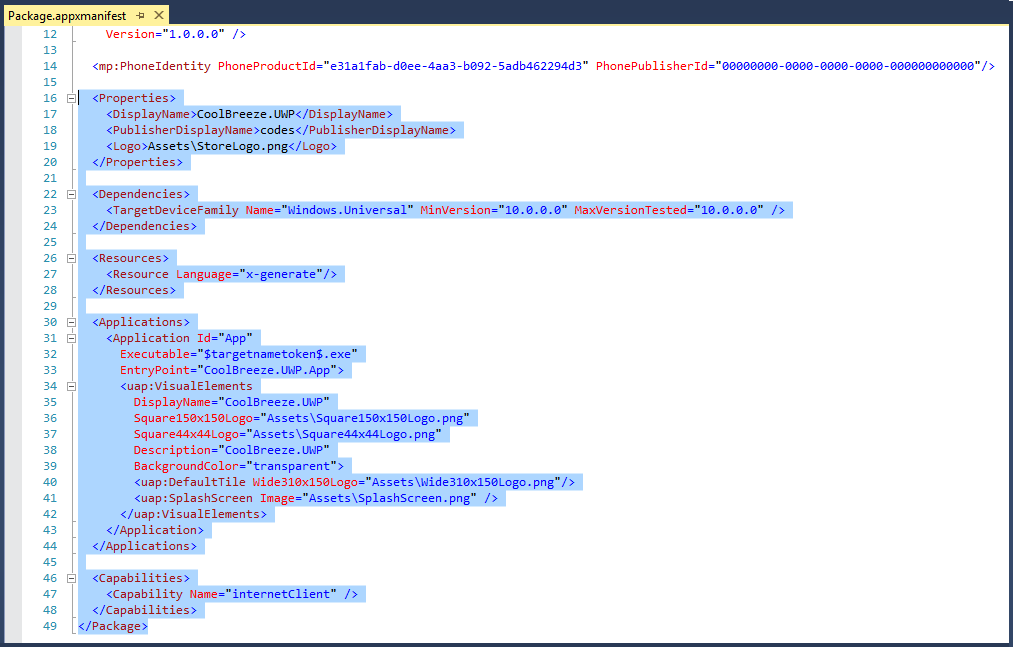
Locate the Properties element in the XML file. Select that element and all of the statements that follow it.
Selecting statements in the package manifest
-
Replace the statements you selected with the following XML to update the manifest file to reference the updated assets.
  <Properties>
    <DisplayName>CoolBreeze</DisplayName>
    <PublisherDisplayName>Xamarin Developer</PublisherDisplayName>
    <Logo>Assets\CoolBreeze_50x50.png</Logo>
  </Properties>
  <Dependencies>
    <TargetDeviceFamily Name="Windows.Universal" MinVersion="10.0.0.0" MaxVersionTested="10.0.0.0" />
  </Dependencies>
  <Resources>
    <Resource Language="x-generate" />
  </Resources>
  <Applications>
    <Application Id="App" Executable="$targetnametoken$.exe" EntryPoint="CoolBreeze.UWP.App">
      <uap:VisualElements DisplayName="CoolBreeze" Square150x150Logo="Assets\CoolBreeze_150x150.png" Square44x44Logo="Assets\CoolBreeze_44x44.png" Description="CoolBreeze.UWP" BackgroundColor="#003366">
        <uap:DefaultTile Wide310x150Logo="Assets\CoolBreeze_310x150.png" Square310x310Logo="Assets\CoolBreeze_310x310.png" Square71x71Logo="Assets\CoolBreeze_71x71.png">
        </uap:DefaultTile>
        <uap:SplashScreen Image="Assets\CoolBreeze_splash.png" BackgroundColor="#003366" />
      </uap:VisualElements>
    </Application>
  </Applications>
  <Capabilities>
    <Capability Name="internetClient" />
    <DeviceCapability Name="location" />
  </Capabilities>
</Package>
-
Now it's time to run the app for the first time. Let's start with the Android version of the app. Ensure that the Android project is selected as the startup project by right-clicking the CoolBreeze.Android project in Solution Explorer and selecting Set as StartUp Project.
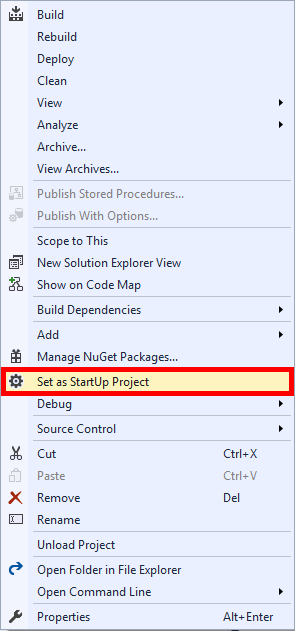
Making the Android project the startup project
-
Click the Run button (the one with the green arrow) at the top of Visual Studio to launch the Android version of CoolBreeze in the selected Android emulator. Note that the emulator will probably take a minute or two to start.

Launching the Android app
-
Confirm that the app appears in the Android emulator. Leave the Android emulator running (that will allow the Android app to start quickly next time). Then return to Visual Studio and select Stop Debugging from the Debug menu to stop debugging.
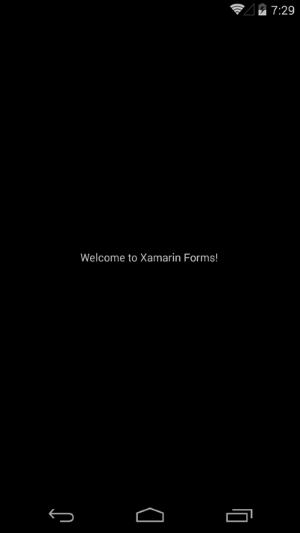
CoolBreeze on Android
-
Open the Settings app on your PC (an easy way to do it is to click the Windows button, type "Settings," and click Settings). Then click Update & security followed by For developers, and select Developer mode if it isn't already selected.
If you try to enable developer mode and receive an error, see https://www.kapilarya.com/developer-mode-package-failed-to-install-error-code-0x80004005-windows-10 for a potential fix.
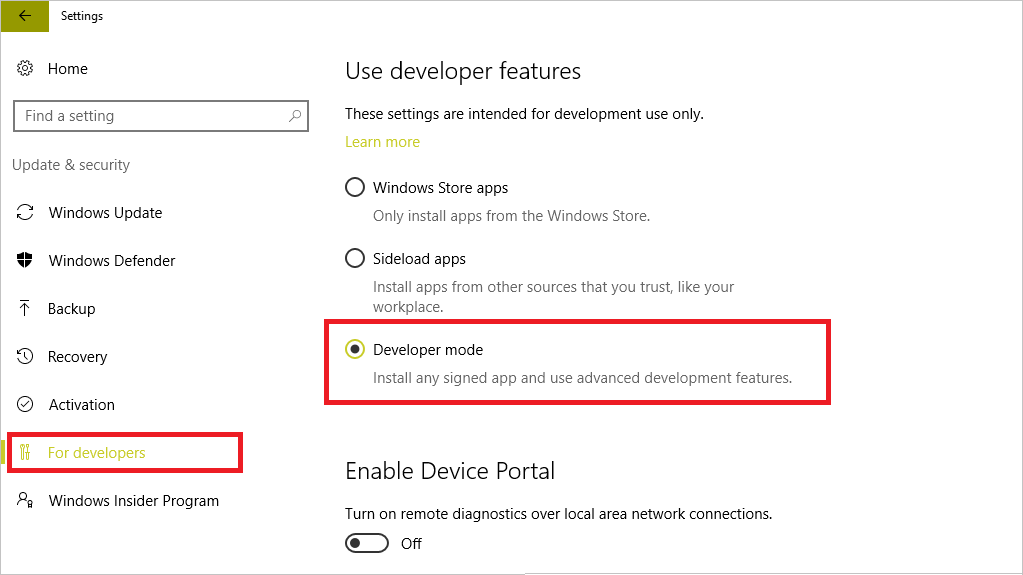
Enabling developer mode in Windows 10
-
Make CoolBreeze.UWP the startup project by right-clicking it and selecting Set as StartUp Project. Then deploy the UWP app to your computer by right-clicking the CoolBreeze.UWP project in Solution Explorer and selecting Deploy.
-
Click the Run button at the top of Visual Studio to launch the UWP version of CoolBreeze on the local machine.
If you would prefer to run the UWP app in a Windows phone emulator rather than on the desktop, simply select the desired emulator from the drop-down list attached to the Run button.

Launching the UWP app
-
If you configured Visual Studio to build iOS projects, make CoolBreeze.iOS the startup project and click the Run button to launch it in the iOS simulator.
Remember that you can only build and run the iOS version of the app if you configured a Mac to serve as the build host and connected Visual Studio to the Mac. For more information, see https://developer.xamarin.com/guides/ios/getting_started/installation/windows/.
-
Return to the home screen in each of the emulators you tested. Notice the CoolBreeze icons on the home screens, which come from the platform-specific assets that you added to the projects. When the app launches, notice the custom splash screen, too.
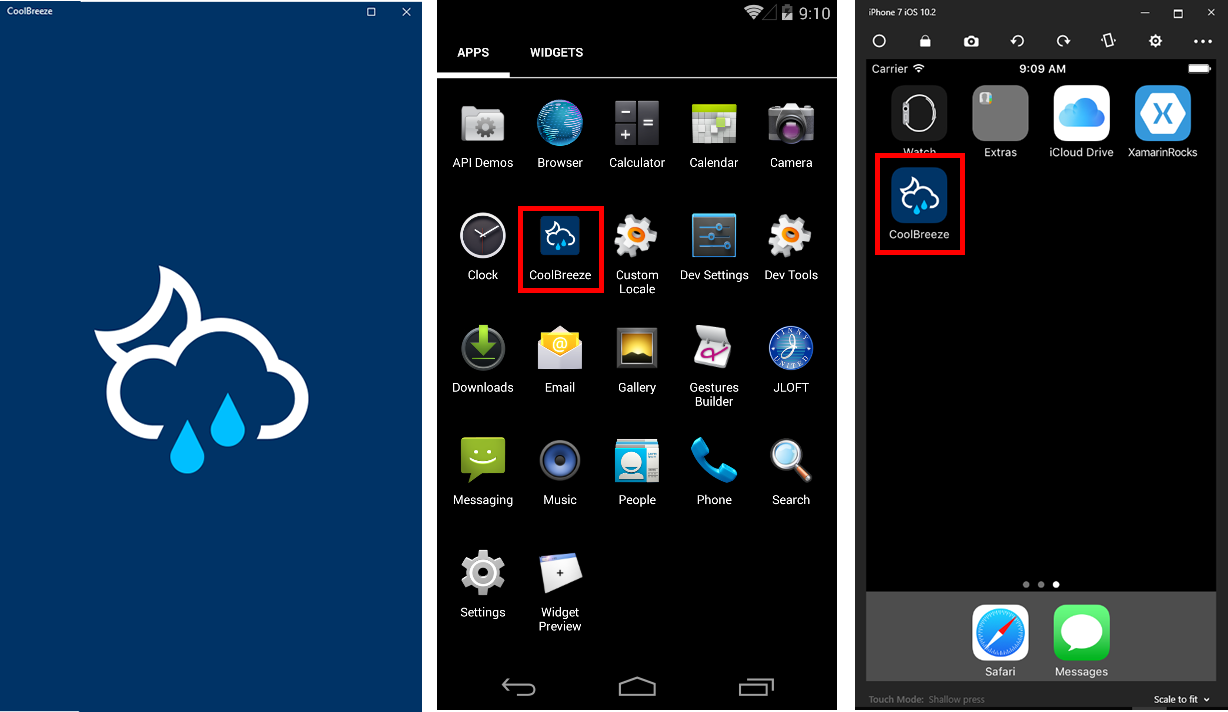
CoolBreeze branding
All of the necessary assets have been added to the Xamarin Forms projects. Now it's time to add code to make the app do something useful.
Exercise 4: Add common logic to the Portable project
Xamarin Forms supports popular package managers such as NuGet. To simplify the parsing of JSON data, such as data returned from a weather service, CoolBreeze will use the popular open-source package JSON.NET. It will also use the Microsoft HttpClient package to place calls to the weather service. In this exercise, you will import these packages and then write code that uses them to retrieve weather data.
-
In Solution Explorer, expand the CoolBreeze (Portable) project. Then right-click References and select Manage NuGet Packages... from the context menu.
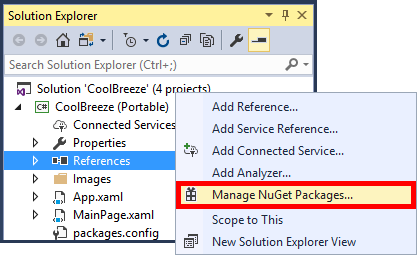
Managing NuGet packages
-
Click Browse in the NuGet Package Manager. Then select the Newtonsoft.Json package and click Install to install the latest stable version. If prompted to review changes, click OK.
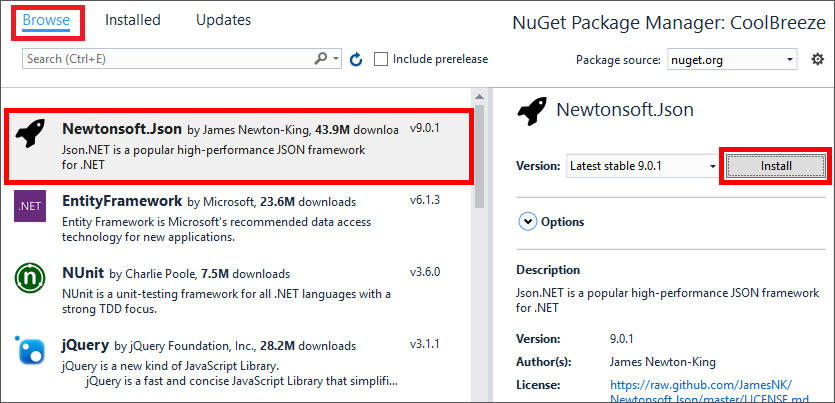
Installing JSON.NET
-
Still in the NuGet Package Manager, type "HttpClient" into the search box, and then select Microsoft.Net.Http in the results list. Ensure that the latest stable version of the package is selected, and then click Install. If prompted to review changes, click OK. If prompted to accept a license, click I Accept.
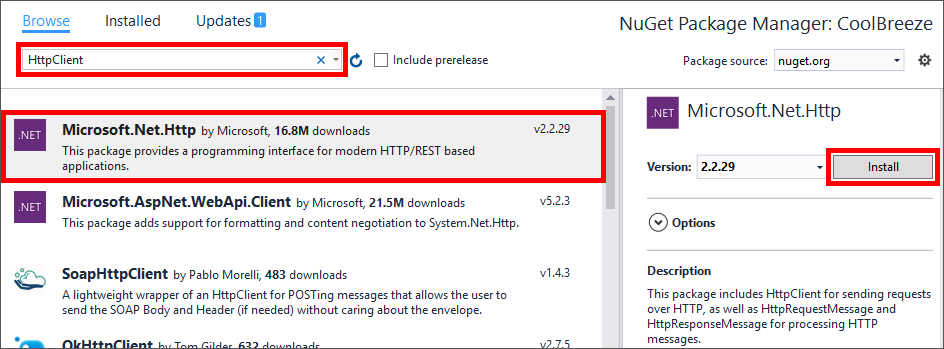
Installing Microsoft.Net.Http
-
In Solution Explorer, right-click the CoolBreeze (Portable) project and use the Add > New Folder command to add a folder named "Common." Then repeat this step to add folders named "Helpers," "Models," and "ViewModels" to the project.
-
Right-click the "Common" folder that you just added and use the Add > Existing Item... command to add all the files in the "Resources\Portable\Common" folder in the zip file containing this challenge to the project's "Common" folder. These files facilitate commanding and property-binding notifications for the user interface.
-
Right-click the "Models" folder and use the Add > Class command to add a class file named "WeatherInformation.cs" to the folder. Then replace the contents of the file with the following code. This class serves as the data model for weather information displayed by your app.
using CoolBreeze.Common;
using System;
using System.Collections.Generic;
using System.Linq;
using System.Text;
using System.Threading.Tasks;

namespace CoolBreeze
{
    public class WeatherInformation : ObservableBase
    {
        private int _id;
        public int Id
        {
            get { return this._id; }
            set { this.SetProperty(ref this._id, value); }
        }

        private string _displayName;
        public string DisplayName
        {
            get { return this._displayName; }
            set { this.SetProperty(ref this._displayName, value); }
        }

        private int _temperature;
        public int Temperature
        {
            get { return this._temperature; }
            set { this.SetProperty(ref this._temperature, value); }
        }

        private int _humidity;
        public int Humidity
        {
            get { return this._humidity; }
            set { this.SetProperty(ref this._humidity, value); }
        }

        private int _minTemperature;
        public int MinTemperature
        {
            get { return this._minTemperature; }
            set { this.SetProperty(ref this._minTemperature, value); }
        }

        private int _maxTemperature;
        public int MaxTemperature
        {
            get { return this._maxTemperature; }
            set { this.SetProperty(ref this._maxTemperature, value); }
        }

        private string _conditions;
        public string Conditions
        {
            get { return this._conditions; }
            set { this.SetProperty(ref this._conditions, value); }
        }

        private string _description;
        public string Description
        {
            get { return this._description; }
            set { this.SetProperty(ref this._description, value); }
        }

        private string _icon;
        public string Icon
        {
            get { return this._icon; }
            set { this.SetProperty(ref this._icon, value); }
        }

        private DateTime _timeStamp;
        public DateTime TimeStamp
        {
            get { return this._timeStamp; }
            set { this.SetProperty(ref this._timeStamp, value); }
        }
    }
}
-
Right-click the "Helpers" folder and use the Add > Class command to add a class file named "WeatherHelper.cs." Then replace the contents of the file with the following code. This class facilitates calling an Azure API service to retrieve weather information.
using System;
using System.Collections.Generic;
using System.Linq;
using System.Net.Http;
using System.Text;
using System.Threading.Tasks;
namespace CoolBreeze.Helpers
{
public class WeatherHelper
{
public async static Task<WeatherInformation> GetCurrentConditionsAsync(string cityName, string countryCode)
{
string url = $"http://traininglabservices.azurewebsites.net/api/weather/current/city?cityName={cityName}&countryCode={countryCode}®istrationCode={App.RegistrationCode}";
HttpClient client = new HttpClient();
var response = await client.GetStringAsync(url);
var result = Newtonsoft.Json.JsonConvert.DeserializeObject<WeatherInformation>(response);
return result;
}
}
}
-
Right-click the "ViewModels" folder and use the Add > Class command to add a class file named "MainViewModel.cs." Then replace the contents of the file with the following code. The purpose of this class is to provide a view-model containing weather data that can update UI elements through data binding.
using CoolBreeze.Common;
using System;
using System.Collections.Generic;
using System.Collections.ObjectModel;
using System.Linq;
using System.Text;
using System.Threading.Tasks;

namespace CoolBreeze
{
    public class MainViewModel : ObservableBase
    {
        public MainViewModel()
        {
            this.IsBusy = true;
            this.NeedsRefresh = true;
            this.LocationType = LocationType.City;
            this.CityName = "Amsterdam";
            this.CountryCode = "HL";
            this.CurrentConditions = new WeatherInformation();
        }

        private LocationType _locationType;
        public LocationType LocationType
        {
            get { return this._locationType; }
            set { this.SetProperty(ref this._locationType, value); }
        }

        private string _postalCode;
        public string PostalCode
        {
            get { return this._postalCode; }
            set { this.SetProperty(ref this._postalCode, value); }
        }

        private string _cityName;
        public string CityName
        {
            get { return this._cityName; }
            set { this.SetProperty(ref this._cityName, value); }
        }

        private string _countryCode;
        public string CountryCode
        {
            get { return this._countryCode; }
            set { this.SetProperty(ref this._countryCode, value); }
        }

        private WeatherInformation _currentConditions;
        public WeatherInformation CurrentConditions
        {
            get { return this._currentConditions; }
            set { this.SetProperty(ref this._currentConditions, value); }
        }

        private bool _needsRefresh;
        public bool NeedsRefresh
        {
            get { return this._needsRefresh || string.IsNullOrEmpty(this._currentConditions.Conditions); }
            set { this.SetProperty(ref this._needsRefresh, value); }
        }

        private bool _isBusy;
        public bool IsBusy
        {
            get { return this._isBusy; }
            set { this.SetProperty(ref this._isBusy, value); }
        }

        public async void RefreshCurrentConditionsAsync()
        {
            this.IsBusy = true;
            this.NeedsRefresh = false;

            WeatherInformation results = await Helpers.WeatherHelper.GetCurrentConditionsAsync(this.CityName, this.CountryCode);

            this.CurrentConditions.Conditions = results.Conditions;
            this.CurrentConditions.Description = results.Description;
            this.CurrentConditions.DisplayName = results.DisplayName;
            this.CurrentConditions.Icon = results.Icon;
            this.CurrentConditions.Id = results.Id;
            this.CurrentConditions.MaxTemperature = results.MaxTemperature;
            this.CurrentConditions.MinTemperature = results.MinTemperature;
            this.CurrentConditions.Temperature = results.Temperature;
            this.CurrentConditions.Humidity = results.Humidity;
            this.CurrentConditions.TimeStamp = results.TimeStamp.ToLocalTime();

            this.IsBusy = false;
        }
    }
}
The PCL project now contains shared logic to support a rich user experience. The next step is to create a user experience that utilizes the logic.
Exercise 5: Add a responsive user interface
In previous exercises, you created a solid foundation for a great cross-platform mobile experience with virtually 100% shared code, organized in a way that is easily maintained and extended. In this exercise, you will add a user interface to show off all your hard work.
-
In Solution Explorer, double-click the App.xaml file in the CoolBreeze (Portable) project to open it for editing.
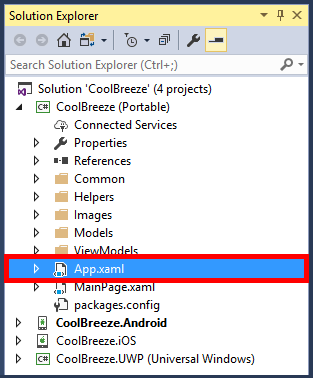
Opening App.xaml
-
Replace the contents of App.xaml with the following XAML:
<?xml version="1.0" encoding="utf-8" ?>
<Application xmlns="http://xamarin.com/schemas/2014/forms"
             xmlns:x="http://schemas.microsoft.com/winfx/2009/xaml"
             xmlns:common="clr-namespace:CoolBreeze.Common;assembly=CoolBreeze"
             x:Class="CoolBreeze.App">
    <Application.Resources>
        <ResourceDictionary>

            <common:IconToUrlConverter  x:Key="IconToUrlConverter"/>
            <common:BooleanToFalseConverter  x:Key="BooleanToFalseConverter"/>
            <common:ZeroToPlaceholderConverter  x:Key="ZeroToPlaceholderConverter"/>
            <common:UpdatedLabelConverter  x:Key="UpdatedLabelConverter"/>
            <common:ForecastTimeLabelConverter  x:Key="ForecastTimeLabelConverter"/>
            <common:CharacterLabelConverter  x:Key="CharacterLabelConverter"/>

            <Color x:Key="AppBaseColor">#003366</Color>
            <Color x:Key="AppAccentColor">#00BFFF</Color>

        </ResourceDictionary>
    </Application.Resources>
</Application>
-
Expand the App.xaml node and double-click App.xaml.cs.
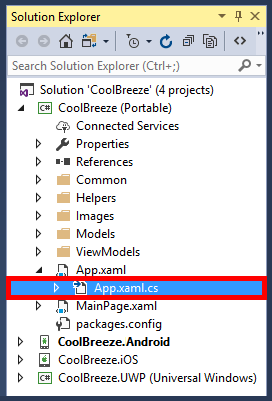
Opening App.xaml.cs
-
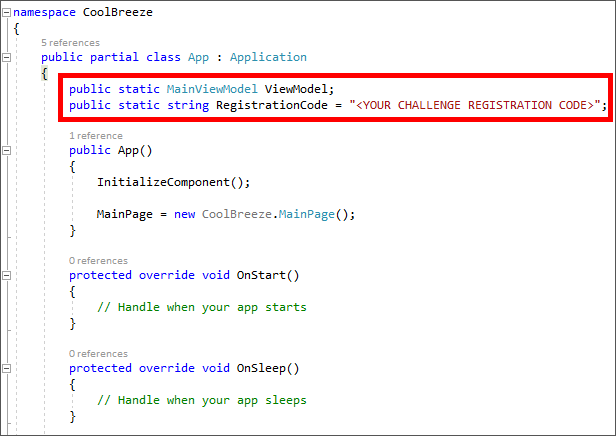
Enter the following statements directly above the App constructor:
public static MainViewModel ViewModel;
public static string RegistrationCode = "<YOUR CHALLENGE REGISTRATION CODE>";
Updating App.xaml.cs
-
Still in App.xaml.cs, replace "<YOUR CHALLENGE REGISTRATION CODE>" with the registration code you received when you registered for the Xamarin Challenge.
The registration code contains a mix of letters and numbers and is 32 characters long. It uniquely identifies you and is required for being eligible for prizes when the Xamarin Challenge ends.
-
Notice the statement in the App constructor that sets the app's MainPage property to an instance of CoolBreeze.MainPage. This makes the MainPage class the one that renders the user interface when the app is started. Your next task is to replace the placeholder XAML in that file with XAML defining the app's user interface. To begin, go to Solution Explorer and double-click MainPage.xaml.
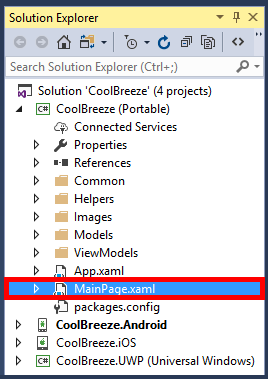
Opening MainPage.xaml
-
Replace the contents of MainPage.xaml with the following XAML:
<?xml version="1.0" encoding="utf-8" ?>
<ContentPage xmlns="http://xamarin.com/schemas/2014/forms"
             xmlns:x="http://schemas.microsoft.com/winfx/2009/xaml"
            Title="Now"
             x:Class="CoolBreeze.MainPage">

    <Grid>
        <Grid.RowDefinitions>
            <RowDefinition Height="Auto"/>
            <RowDefinition Height="Auto"/>
            <RowDefinition Height="Auto"/>
            <RowDefinition Height="Auto"/>
            <RowDefinition Height="Auto"/>
        </Grid.RowDefinitions>

        <Picker Margin="0,60,0,20" HorizontalOptions="Center" VerticalOptions="Start" Title="Select a city" x:Name="cityPicker" SelectedIndexChanged="SelectedCityChanged" WidthRequest="300">
            <Picker.Items>
                <x:String>Amsterdam (NL)</x:String>
                <x:String>Atlanta (US)</x:String>
                <x:String>Buenos Aires (AR)</x:String>
                <x:String>Cairo (EG)</x:String>
                <x:String>Calgary (CA)</x:String>
                <x:String>Chicago (US)</x:String>
                <x:String>Dallas (US)</x:String>
                <x:String>Havana (CU)</x:String>
                <x:String>Houston (US)</x:String>
                <x:String>Las Vegas (US)</x:String>
                <x:String>London (GB)</x:String>
                <x:String>Los Angeles (US)</x:String>
                <x:String>Manhattan (US)</x:String>
                <x:String>San Diego (US)</x:String>
                <x:String>Seattle (US)</x:String>

            </Picker.Items>
        </Picker>


        <StackLayout Grid.Row="1" BindingContext="{Binding}" HorizontalOptions="Center" VerticalOptions="Start" Orientation="Horizontal">
            <Image VerticalOptions="Center" HorizontalOptions="End" Aspect="Fill" HeightRequest="100" WidthRequest="100" Source="{Binding CurrentConditions.Icon, Converter={StaticResource IconToUrlConverter}}" />
            <Label Text="{Binding CurrentConditions.Temperature, Converter={StaticResource ZeroToPlaceholderConverter}}" HorizontalOptions="Start" VerticalOptions="Center" FontSize="64"/>
            <Label Text="°" FontSize="64"/>
            <Label Text="F" VerticalOptions="Center" FontSize="22"/>
        </StackLayout>

        <StackLayout Grid.Row="2" Orientation="Horizontal" HorizontalOptions="Center" VerticalOptions="Start">
            <Label Text="{Binding CurrentConditions.MaxTemperature, Converter={StaticResource CharacterLabelConverter}, ConverterParameter=°}" HorizontalOptions="Start" VerticalOptions="Center" FontSize="Large"/>
            <Label Margin="5,0,0,0" Text="{Binding CurrentConditions.MinTemperature, Converter={StaticResource CharacterLabelConverter}, ConverterParameter=°}" HorizontalOptions="Start" VerticalOptions="Center" FontSize="Small"/>
        </StackLayout>

        <Label Grid.Row="3" FontAttributes="Bold" Text="{Binding CurrentConditions.Conditions}" HorizontalOptions="Center" VerticalOptions="Start" FontSize="Medium"/>
        <Label Grid.Row="4"  Text="{Binding CurrentConditions.TimeStamp, Converter={StaticResource UpdatedLabelConverter}}" HorizontalOptions="Center" VerticalOptions="Start" FontSize="Micro"/>

        <ActivityIndicator Color="{StaticResource AppAccentColor}" VerticalOptions="Center" HorizontalOptions="Center" Grid.RowSpan="5" IsRunning="{Binding IsBusy}" IsEnabled="{Binding IsBusy}" IsVisible="{Binding IsBusy}">
            <ActivityIndicator.WidthRequest>
                <OnPlatform x:TypeArguments="x:Double" iOS="100" Android="100" WinPhone="400" />
            </ActivityIndicator.WidthRequest>
        </ActivityIndicator>

    </Grid>

</ContentPage>
-
Expand the MainPage.xaml node and double-click MainPage.xaml.cs.
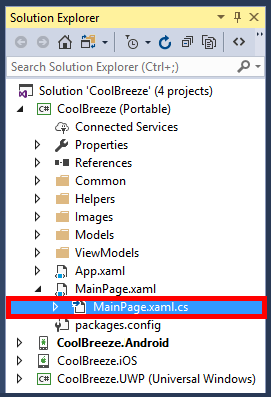
Opening MainPage.xaml.cs
-
Replace the contents of MainPage.xaml.cs with the following code:
using System;
using System.Collections.Generic;
using System.Linq;
using System.Text;
using System.Threading.Tasks;

using Xamarin.Forms;

namespace CoolBreeze
{
    public partial class MainPage : ContentPage
    {
        public MainPage()
        {
            InitializeComponent();
        }

        protected override void OnAppearing()
        {
            if (App.ViewModel == null) App.ViewModel = new MainViewModel();

            this.BindingContext = App.ViewModel;

            if (App.ViewModel.NeedsRefresh) App.ViewModel.RefreshCurrentConditionsAsync();

            if (cityPicker.SelectedIndex < 0) cityPicker.SelectedIndex = 0;

            base.OnAppearing();
        }

        private void SelectedCityChanged(object sender, EventArgs e)
        {
            if (!App.ViewModel.IsBusy)
            {
                App.ViewModel.NeedsRefresh = true;
                App.ViewModel.LocationType = Common.LocationType.City;

                string selectedItem = (sender as Picker).Items[(sender as Picker).SelectedIndex];

                var cityName = selectedItem.Split('(').First().Trim();
                var countryCode = selectedItem.Split('(').Last().Replace(")", "").Trim();

                App.ViewModel.CityName = cityName;
                App.ViewModel.CountryCode = countryCode;

                App.ViewModel.RefreshCurrentConditionsAsync();
            }
        }
    }
}
Almost there! The final step is to run CoolBreeze and see what it looks like on various devices.
Exercise 6: Test the app
In this exercise, you will run the CoolBreeze app and use it to view real-time weather information in various cities.
-
Ensure that the Android project is selected as the startup project by right-clicking it in Solution Explorer and selecting Set as StartUp Project. Then launch the app in the Android emulator.
Launching the Android version of CoolBreeze
-
Confirm that CoolBreeze shows the current weather in Amsterdam. Then tap Amsterdam (NL) to display a list of cities.
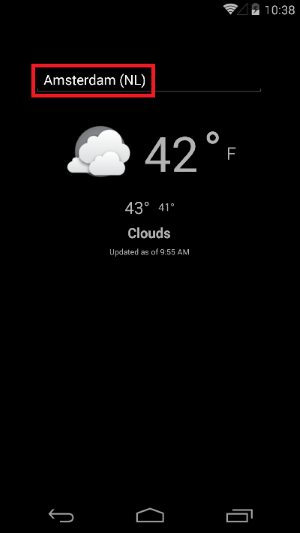
CoolBreeze showing the current weather in Amsterdam
-
Select another city from the list.
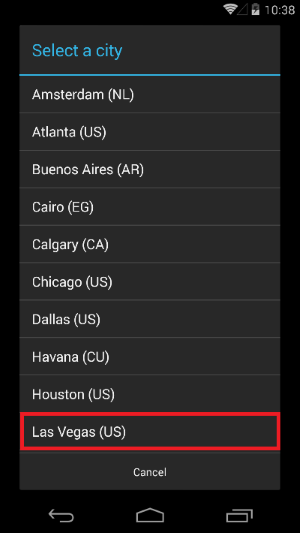
Selecting a different city
-
Confirm that the UI updates to show the current weather in that city.
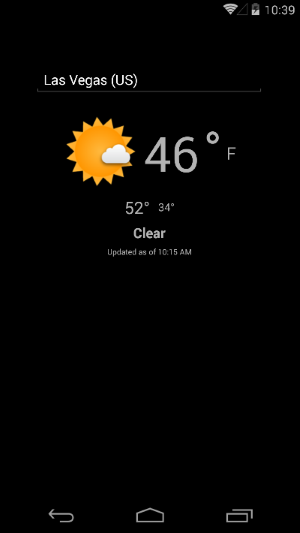
CoolBreeze showing the current weather in Las Vegas
-
Repeat Steps 1 through 4 for the UWP app (and optionally the iOS app) and observe how the user experience differs on other platforms, and yet works exactly the same. Here, for example, is how the app looks on iOS:
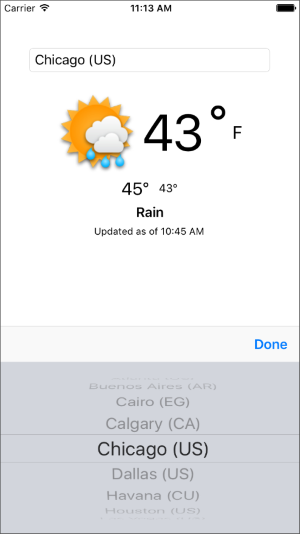
CoolBreeze on iOS
The app runs on all three platforms, but you wrote no platform-specific code. All the C# and XAML added to the app was added to the PCL project, meaning it is shared across all platforms. Moreover, the app was compiled into native code for all three platforms, so it is virtually indistinguishable from a native iOS, Android, or UWP app.
Summary
That's it for Part 1 of the Xamarin Challenge. In a few days, you'll receive Part 2 and have the opportunity to enhance CoolBreeze with additional features. More soon!