Xamarin Challenge Part 2
Overview
One of the key challenges in developing mobile applications for multiple devices and platforms is the divergent set of tools, languages, and resources required to develop and maintain features and functionality across a variety of programming languages, APIs, and user-interface paradigms.
Xamarin offers one solution to the problem by allowing apps to be written in C# for iOS, Android, and Windows using a common API based on Microsoft .NET. Xamarin apps are built with native user interface controls. Apps look and act the way a user expects for a given device and platform. Xamarin apps also have access to the full spectrum of functionality exposed by the underlying operating system and device and are compiled into native binaries for performance.
Xamarin Forms is a framework included with Xamarin that allows developers to create cross-platform user interfaces by defining those interfaces in XAML. Controls and UI elements declared in XAML render native controls for the host platform, so iOS users see iOS controls and Android users see Android controls. Whereas classic Xamarin apps share code but not UI, Xamarin Forms apps share code and UI and are frequently able to share 95% of their source code across platforms.
Visual Studio 2017 provides seamless support for Xamarin and Xamarin Forms so you can build cutting-edge mobile apps for a variety of platforms using a single set of tools and APIs. In Part 2 of the Xamarin Challenge, you will enhance the CoolBreeze app you built in Part 1 by adding geolocation support so the app can display the weather conditions at your current location. You will also add to the app the ability to display weather forecasts.
Objectives
In this challenge, you will learn how to:
- Add geolocation support to a Xamarin Forms app
- Add tabbed pages to a Xamarin Forms app
- Add toolbar navigation to a Xamarin Forms app
Your feedback is important. If you run into issues while working the exercises in this challenge, please contact us at xamarinchallengehelp@microsoft.com.
Prerequisites
The following are required to complete this challenge:
If you wish to build and run the iOS version of the challenge app, you also have to have a Mac running OS X 10.11 or higher, and both the Mac and the PC running Visual Studio 2017 require further configuration. For details, see https://developer.xamarin.com/guides/ios/getting_started/installation/windows/.
Exercises
This challenge includes the following exercises:
Estimated time to complete this challenge: 30 minutes.
Exercise 1: Add geolocation support to the app
Virtually all mobile platforms feature geolocation support, which allows apps to determine the user's current location and even track that location as the user moves. Xamarin doesn't provide a device-independent geolocation API that apps can call upon, but there are free plugins that do. In this exercise, you will import a popular Xamarin plugin that allows any app running on any device to determine the user's location, and then use that plugin to implement a helper method that returns the current location.
-
Open the CoolBreeze solution that you completed in Xamarin Challenge Part 1 in Visual Studio 2017. If you have not completed Part 1, stop now and complete it before proceeding.
-
In the Solution Explorer, right-click the CoolBreeze solution and select Manage NuGet Packages for Solution....
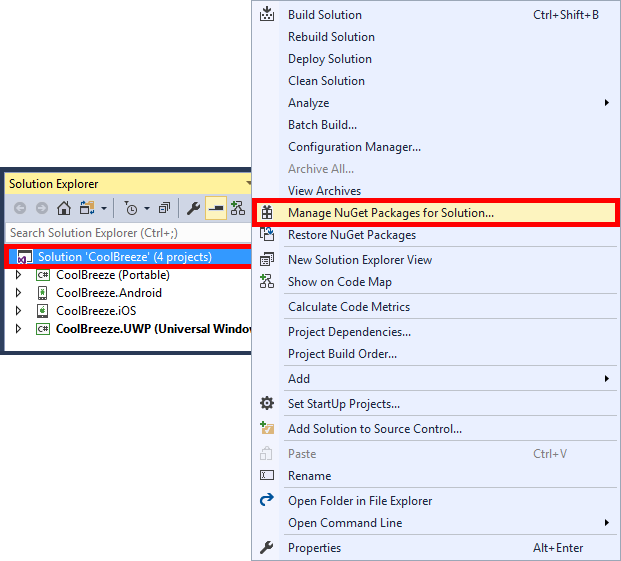
Managing NuGet packages for the solution
-
Ensure that "Browse" is selected in the NuGet Package Manager, and type "Xam.Plugin.Geolocator" (without quotation marks) into the search box. Select the Xam.Plugin.Geolocator package. Then check the Project box to add the package to all of the projects in the solution, and click Install. When prompted to review changes, click OK.
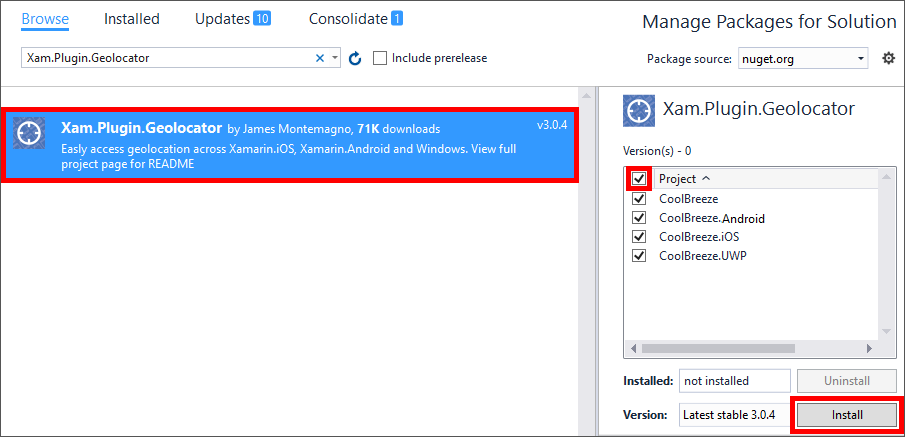
Installing Xam.Plugin.Geolocator
-
Review the readme.txt file generated by the package installer, making note of the platform-specific manifest requirements for access to location services.
Although 100% of the code for geolocation in a Xamarin Forms app can be shared across platforms, there are specific permissions that need to be set on a per-platform basis in order for the host operating system to divulge location information. Providing a user's location without permission is considered a violation of privacy.
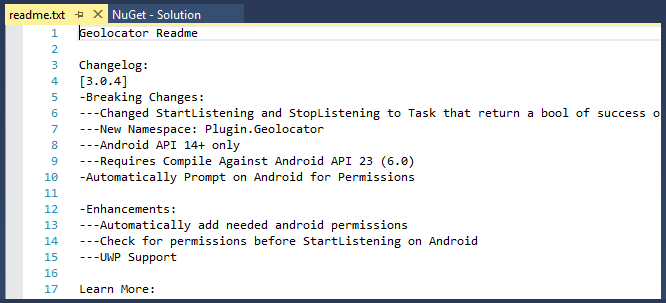
The Xam.Plugin.Geolocator readme file
-
To enable location services on Android, you need to update the app manifest. Open the AndroidManifest.xml file in the CoolBreeze.Android project.
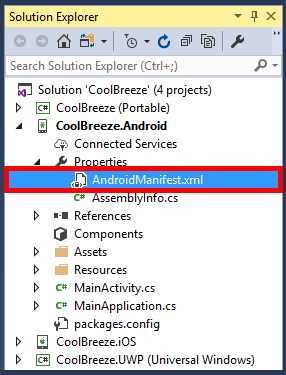
Opening the Android app manifest
-
Add the following statements to the end of the file, right before the closing </manifest> tag:
<uses-permission android:name="android.permission.ACCESS_COARSE_LOCATION" />
<uses-permission android:name="android.permission.ACCESS_FINE_LOCATION" />
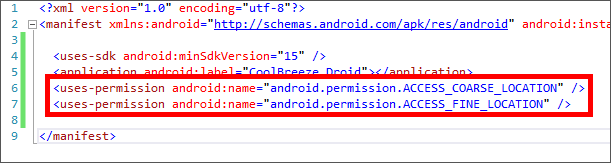
Updating the Android app manifest
-
To enable location services on iOS, you need to update the app's information property list. Open the Info.plist file in the CoolBreeze.iOS project.
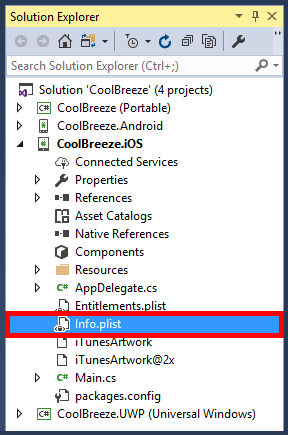
Opening the iOS information property list
-
Scroll to the bottom of the list and click the + sign at bottom left to add a new property.
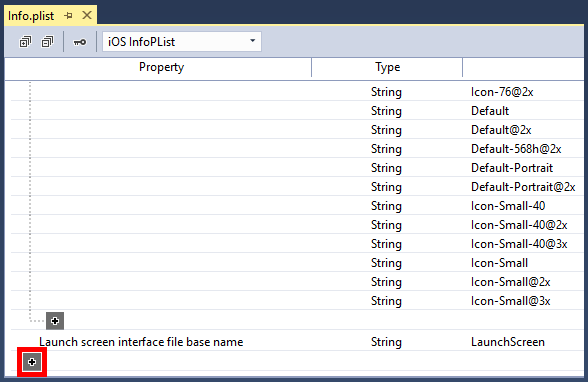
Adding a property to Info.plist
-
From the drop-down list in the "Property" column, select Location Always Usage Description. Then add the following text to the "Value" column:
Please allow CoolBreeze to use your current location.

Updating Info.plist
-
To enable location services on Windows, you need to update the app manifest. Open the Package.appxmanifest file in the CoolBreeze.UWP project.
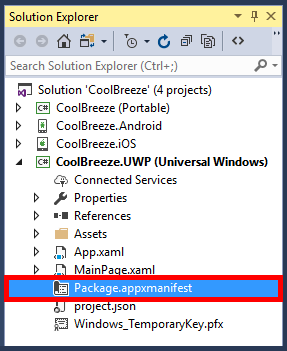
Opening the Windows app manifest
-
Click Capabilities, and then check the Location box.
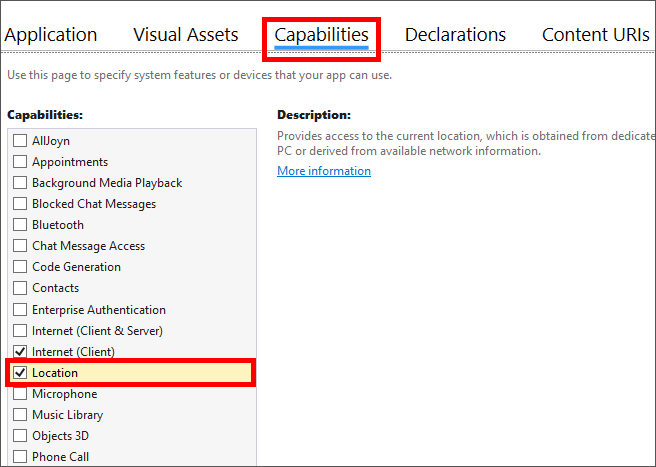
Updating the Windows app manifest
-
Now that permissions are set to allow all of the CoolBreeze projects to access location services, it’s time to add code to retrieve location information. In Solution Explorer, right-click the "Helpers" folder in the CoolBreeze (Portable) project and use the Add > Class command to add a class file named "LocationHelper.cs" to the project. Then replace the contents of the file with the following code:
using System;
using System.Collections.Generic;
using System.Linq;
using System.Text;
using System.Threading.Tasks;

namespace CoolBreeze.Helpers
{
    public static class LocationHelper
    {
        public async static Task<Plugin.Geolocator.Abstractions.Position> GetCurrentLocationAsync()
        {
            Plugin.Geolocator.Abstractions.Position location = new Plugin.Geolocator.Abstractions.Position(new Plugin.Geolocator.Abstractions.Position()
            {
                Latitude = 29.425700,
                Longitude = -98.486110,
            });

            var geolocator = Plugin.Geolocator.CrossGeolocator.Current;

            try
            {
                geolocator.DesiredAccuracy = 100;
                location = await geolocator.GetPositionAsync();
            }
            catch { }

            return location;
        }
    }
}
The code you just added contains an asynchronous method named GetCurrentLocationAsync that retrieves the user's location, complete with a default location for testing. It, in turn, relies on APIs in Xam.Plugin.Geolocator to retrieve the current location.
Exercise 2: Add a tabbed page to the app
Now that location services are enabled on all platforms, it's time to build a user interface around them. In this exercise, you will add a new page for specifying location preferences and add a tabbed page to allow users to easily switch between the page showing location preferences and the page showing current weather conditions.
-
In Solution Explorer, right-click the CoolBreeze (Portable) project and select Add > New Item.... Then select Forms Blank Content Page Xaml, specify "LocationPage.xaml" as the name, and click Add.
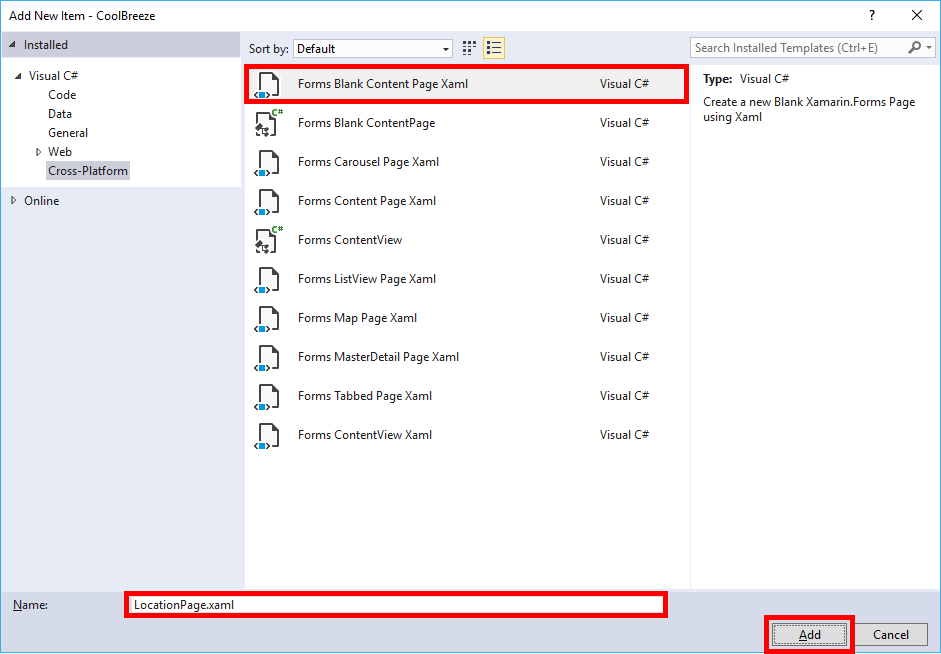
Adding a location preferences page
-
Replace the contents of LocationPage.xaml with the following XAML:
<?xml version="1.0" encoding="utf-8" ?>
<ContentPage xmlns="http://xamarin.com/schemas/2014/forms"
             xmlns:x="http://schemas.microsoft.com/winfx/2009/xaml" Title="Location"
             x:Class="CoolBreeze.LocationPage">

    <StackLayout Margin="20" VerticalOptions="Start" HorizontalOptions="Center">

        <Label FontSize="Medium" Text="Select the way you want to get weather information. If you select to use your current location, your device may prompt you for permission."/>

        <StackLayout Margin="0,20,0,0" WidthRequest="300" HorizontalOptions="CenterAndExpand" Orientation="Horizontal">
            <Label FontSize="Medium" HorizontalOptions="Start" VerticalOptions="Center" Text="Use my current location"/>
            <Switch x:Name="useLocationToggle" HorizontalOptions="End" IsToggled="False" Margin="20,0,0,0" Toggled="UseLocationToggled" VerticalOptions="Center"/>
        </StackLayout>

        <StackLayout Margin="0,20,0,0" WidthRequest="300" HorizontalOptions="CenterAndExpand" Orientation="Vertical">
            <Label FontSize="Medium" HorizontalOptions="Start" VerticalOptions="Center" Text="Select a City:"/>
            <Picker Title="Select a city" x:Name="cityPicker" SelectedIndexChanged="SelectedCityChanged" WidthRequest="300" HorizontalOptions="StartAndExpand">
                <Picker.Items>
                    <x:String>Amsterdam (NL)</x:String>
                    <x:String>Atlanta (US)</x:String>
                    <x:String>Buenos Aires (AR)</x:String>
                    <x:String>Cairo (EG)</x:String>
                    <x:String>Calgary (CA)</x:String>
                    <x:String>Chicago (US)</x:String>
                    <x:String>Dallas (US)</x:String>
                    <x:String>Havana (CU)</x:String>
                    <x:String>Houston (US)</x:String>
                    <x:String>Las Vegas (US)</x:String>
                    <x:String>London (GB)</x:String>
                    <x:String>Los Angeles (US)</x:String>
                    <x:String>Manhattan (US)</x:String>
                    <x:String>San Diego (US)</x:String>
                    <x:String>Seattle (US)</x:String>
                </Picker.Items>
            </Picker>
        </StackLayout>
    </StackLayout>
</ContentPage>
-
Open LocationPage.xaml.cs and replace its contents with the following code:
using System;
using System.Collections.Generic;
using System.Linq;
using System.Text;
using System.Threading.Tasks;

using Xamarin.Forms;

namespace CoolBreeze
{
    public partial class LocationPage : ContentPage
    {
        public LocationPage()
        {
            InitializeComponent();
        }

        protected override void OnAppearing()
        {
            if (cityPicker.SelectedIndex < 0) cityPicker.SelectedIndex = 0;
            base.OnAppearing();
        }

        private void UseLocationToggled(object sender, ToggledEventArgs e)
        {
            App.ViewModel.NeedsRefresh = true;

            if (e.Value)
            {
                App.ViewModel.LocationType = Common.LocationType.Location;
            }
            else
            {
                App.ViewModel.LocationType = Common.LocationType.City;
            }
        }

        private void SelectedCityChanged(object sender, EventArgs e)
        {
            if (!App.ViewModel.IsBusy)
            {
                useLocationToggle.IsToggled = false;

                App.ViewModel.NeedsRefresh = true;
                App.ViewModel.LocationType = Common.LocationType.City;

                string selectedItem = (sender as Picker).Items[(sender as Picker).SelectedIndex];

                var cityName = selectedItem.Split('(').First().Trim();
                var countryCode = selectedItem.Split('(').Last().Replace(")", "").Trim();

                App.ViewModel.CityName = cityName;
                App.ViewModel.CountryCode = countryCode;
            }

            App.ViewModel.IsBusy = false;
        }
    }
}
-
Right-click the CoolBreeze (Portable) project and use the Add > New Item... command to add another page named StartPage.xaml.
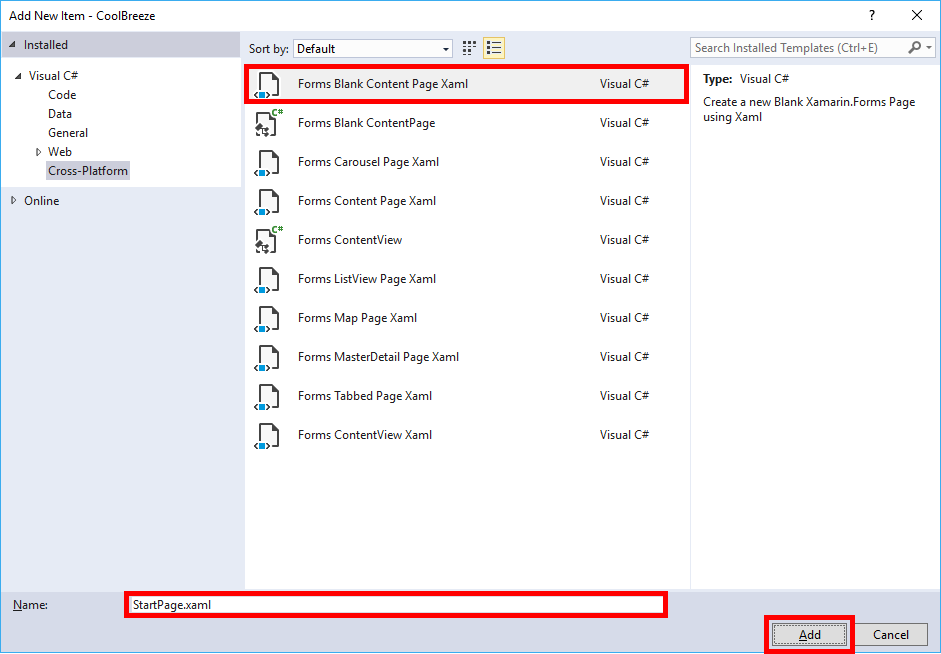
Adding a tabbed start page
-
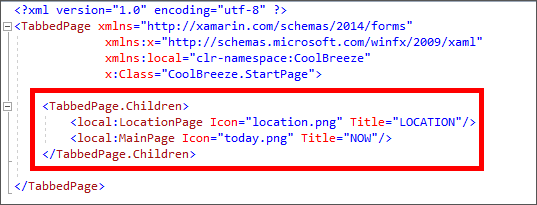
Replace the contents of StartPage.xaml file with the following XAML:
<?xml version="1.0" encoding="utf-8" ?>
<TabbedPage xmlns="http://xamarin.com/schemas/2014/forms"
             xmlns:x="http://schemas.microsoft.com/winfx/2009/xaml"
             xmlns:local="clr-namespace:CoolBreeze"
             x:Class="CoolBreeze.StartPage">

    <TabbedPage.Children>
        <local:LocationPage Icon="location.png" Title="LOCATION"/>
        <local:MainPage Icon="today.png" Title="NOW"/>
    </TabbedPage.Children>

</TabbedPage>
-
Open StartPage.xaml.cs and replace its contents with the following code:
using System;
using System.Collections.Generic;
using System.Linq;
using System.Text;
using System.Threading.Tasks;
using Xamarin.Forms;

namespace CoolBreeze
{
    public partial class StartPage : TabbedPage
    {
        public StartPage()
        {
            InitializeComponent();
        }

        protected override void OnAppearing()
        {
            InitializeAppAsync();
            base.OnAppearing();
        }

        private void InitializeAppAsync()
        {
            if (App.ViewModel == null) App.ViewModel = new MainViewModel();
        }
    }
}
-
Open MainPage.xaml in the CoolBreeze (Portable) project and locate the Picker control:
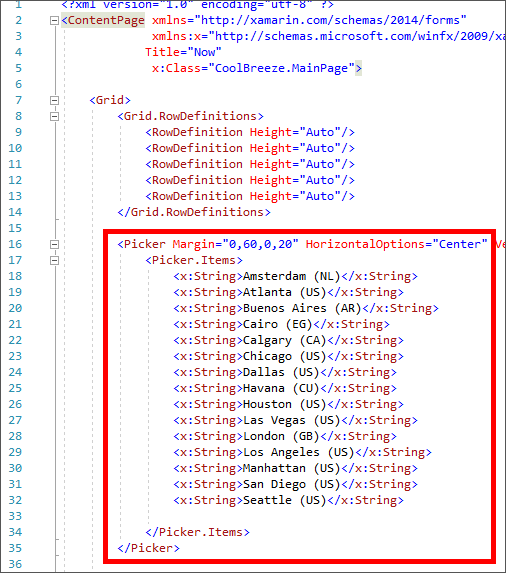
The city-picker control
-
Remove the Picker control and replace it with the following Label control:
<Label Margin="0,60,0,0" VerticalOptions="Start" HorizontalOptions="Center"
Text="{Binding CurrentConditions.DisplayName}"  FontSize="Medium"/>
-
Open MainPage.xaml.cs. Find the method named OnAppearing and replace it with the following OnAppearing method:
protected override void OnAppearing()
{
    this.BindingContext = App.ViewModel;
    if (App.ViewModel.NeedsRefresh) App.ViewModel.RefreshCurrentConditionsAsync();
    base.OnAppearing();
}
-
Still in MainPage.xaml.cs, find the SelectedCityChanged method and delete it from the file.
-
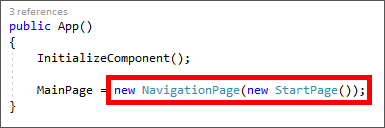
Open App.xaml.cs in the CoolBreeze (Portable) project. In the class constructor, modify the line of code that instantiates the MainPage class so that it instantiates StartPage instead.
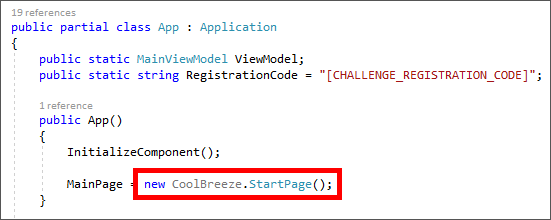
The updated App constructor
-
Open WeatherHelper.cs in the "Helpers" folder of the CoolBreeze (Portable) project. Add the following method to the WeatherHelper class. DO NOT delete the GetCurrentConditionsAsync method that is already there; rather, add the new one and leave the old one in place. The new method accepts a longitude and latitude as parameters.
public async static Task<WeatherInformation> GetCurrentConditionsAsync(double latitude, double longitude)
{
string url = $"http://traininglabservices.azurewebsites.net/api/weather/current?latitude={latitude}&longitude={longitude}®istrationCode={App.RegistrationCode}";
HttpClient client = new HttpClient();
var response = await client.GetStringAsync(url);
var result = Newtonsoft.Json.JsonConvert.DeserializeObject<WeatherInformation>(response);
return result;
}
-
Open MainViewModel.cs in the "ViewModels" folder of the CoolBreeze (Portable) project. Add the following statements to the MainViewModel class to add a Location property to the view-model:
private Plugin.Geolocator.Abstractions.Position _location;
public Plugin.Geolocator.Abstractions.Position Location
{
    get { return this._location; }
    set { this.SetProperty(ref this._location, value); }
}
-
Still in MainViewModel.cs, replace the RefreshCurrentConditionsAsync method with this one:
public async void RefreshCurrentConditionsAsync()
{
    this.IsBusy = true;
    this.NeedsRefresh = false;

    WeatherInformation results = null;

    switch (this.LocationType)
    {
        case LocationType.Location:
            if (this.Location == null) this.Location = await Helpers.LocationHelper.GetCurrentLocationAsync();
            results = await Helpers.WeatherHelper.GetCurrentConditionsAsync(this.Location.Latitude, this.Location.Longitude);
            break;

        case LocationType.City:
            results = await Helpers.WeatherHelper.GetCurrentConditionsAsync(this.CityName, this.CountryCode);
            break;
    }

    this.CurrentConditions.Conditions = results.Conditions;
    this.CurrentConditions.Description = results.Description;
    this.CurrentConditions.DisplayName = results.DisplayName;
    this.CurrentConditions.Icon = results.Icon;
    this.CurrentConditions.Id = results.Id;
    this.CurrentConditions.MaxTemperature = results.MaxTemperature;
    this.CurrentConditions.MinTemperature = results.MinTemperature;
    this.CurrentConditions.Temperature = results.Temperature;
    this.CurrentConditions.Humidity = results.Humidity;
    this.CurrentConditions.TimeStamp = results.TimeStamp.ToLocalTime();

    this.IsBusy = false;
}
-
Now let's add some flair to the user interface by adding icons to the tabs in the tabbed page. Recall that image assets typically need to be placed in specific locations for each platform. In Solution Explorer, right-click the "drawable" folder in the CoolBreeze.Android project and select Add > Existing Item... from the context menu.
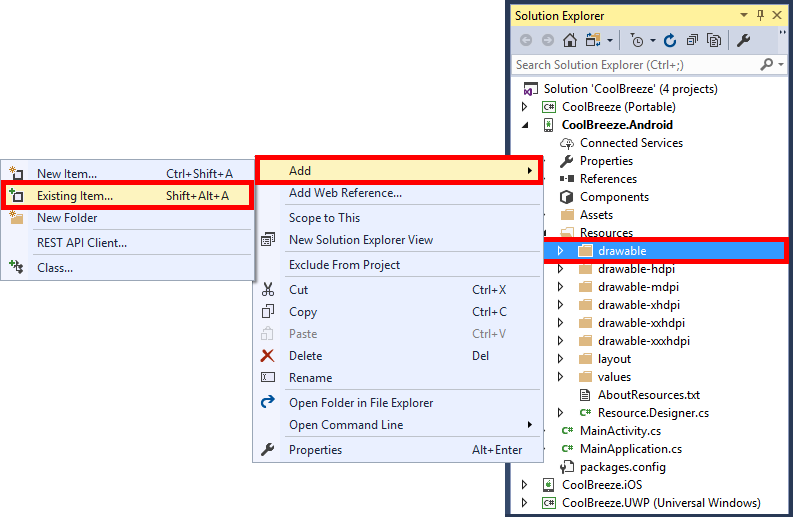
Adding items to the drawable folder
-
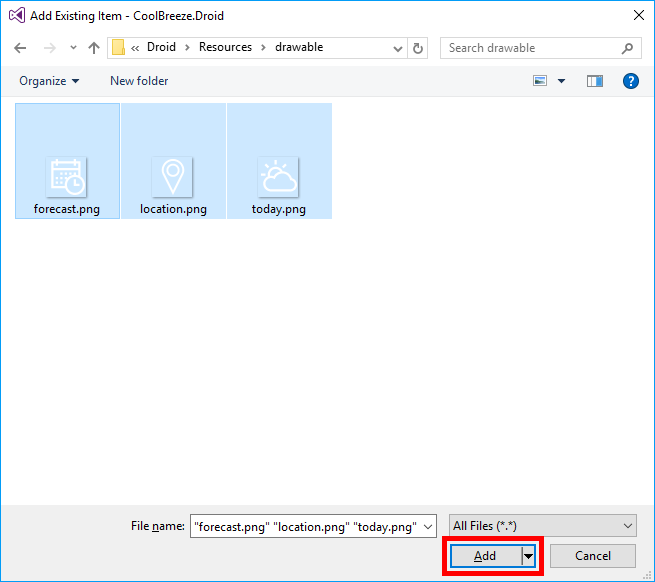
Browse to the "Resources\Droid\Resources\drawable" folder in the zip file containing this challenge and select all of the files in that folder. Then click Add.
Adding items to the "drawable" folder
-
Repeat Steps 15 and 16 to add all the files in the zip file's "Resources\iOS\Resources" folder to the "Resources" folder of the CoolBreeze.iOS project.
-
Repeat Steps 15 and 16 to add all the files in the zip file's "Resources\UWP" folder to the root of the CoolBreeze.UWP project.
-
The next step is to build the app and test it. You can test location services in most mobile emulators, but it's easy enough to test on your PC. Right-click the CoolBreeze.UWP (Universal Windows) project and select Set as StartUp Project to make it the startup project. Right-click the project again and select Deploy. Now launch CoolBreeze on your local machine by clicking the Run button in the toolbar.

Running CoolBreeze on the local machine
-
Observe the new tabbed navigation elements at the top of the page:
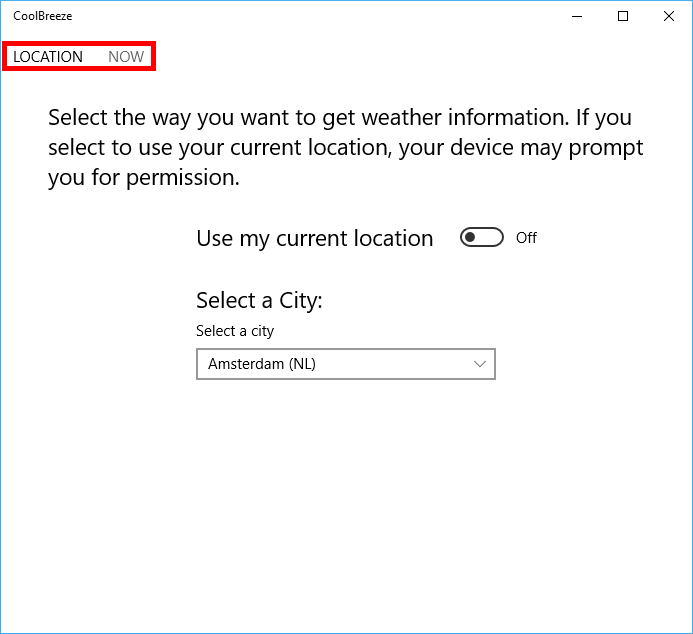
CoolBreeze's new tabbed UI
-
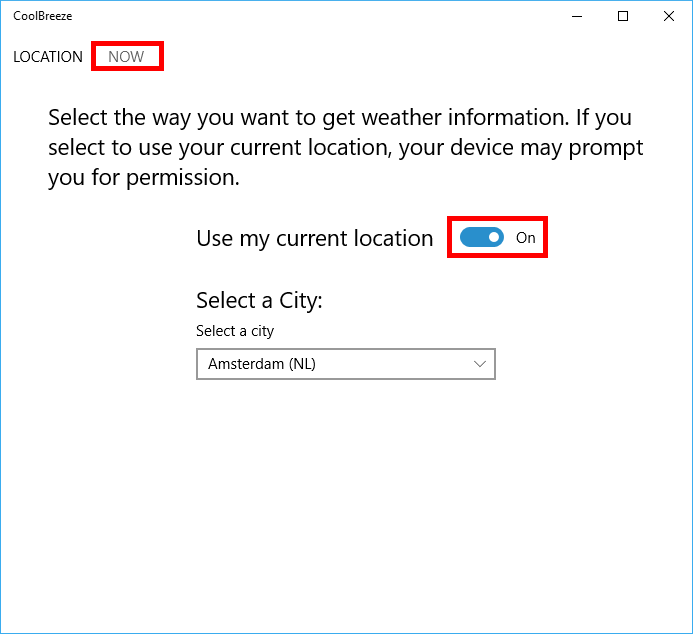
Toggle Use my current location to On, and then click the NOW tab to view weather conditions at your current location.
Enabling "Use my current location"
-
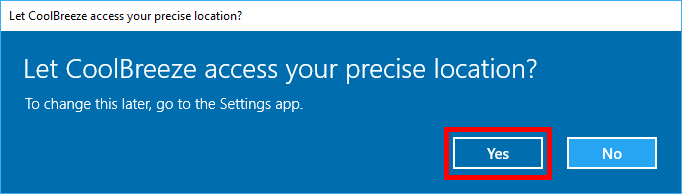
When prompted for permission to access your current location, click Yes.
Allowing CoolBreeze to use your location
-
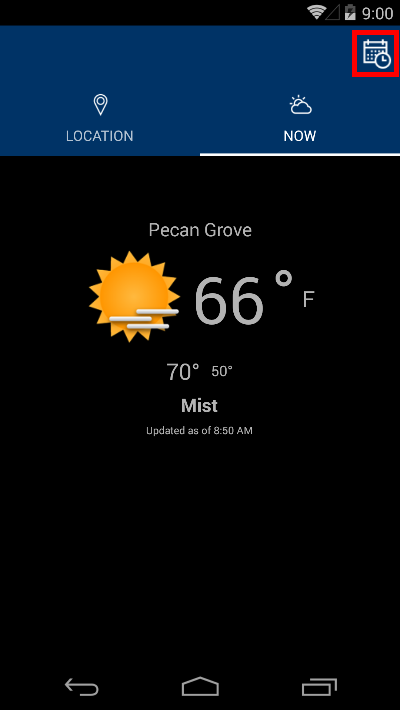
Confirm that CoolBreeze reports the weather at your current location.
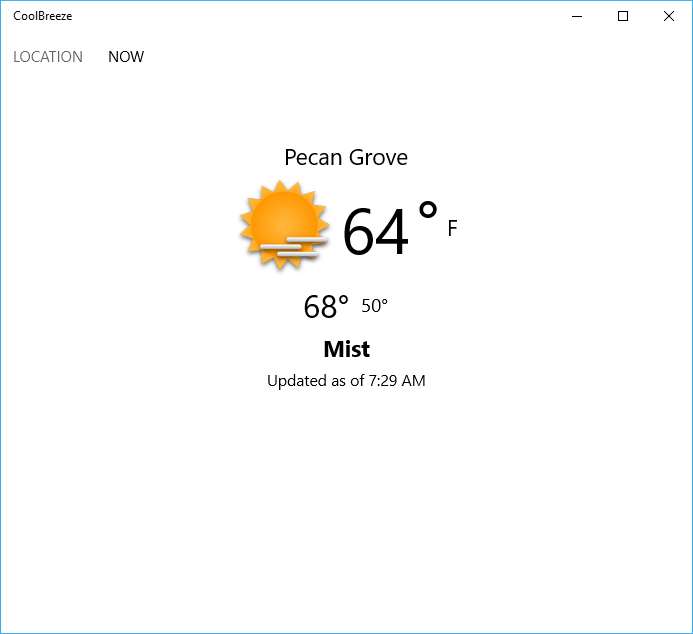
CoolBreeze showing the weather in Pecan Grove, TX
Feel free to run the app on iOS and Android as well to see how it behaves there. Most emulators allow you to set the current location in order to test apps that use geolocation services by varying the location that the geolocation API returns.
Exercise 3: Add toolbar navigation to the app
In this exercise, you will further enhance CoolBreeze by adding a master/detail view allowing users to view weather forecasts as well as current weather conditions. You will also add a toolbar to facilitate switching from the view showing the current weather to the view showing the weather forecast.
-
Open WeatherHelper.cs in the "Helpers" folder of the CoolBreeze (Portable) project. Then add the following methods to the WeatherHelper class:
public async static Task<List<WeatherInformation>> GetForecastAsync(double latitude, double longitude)
{
string url = $"http://traininglabservices.azurewebsites.net/api/weather/forecast?latitude={latitude}&longitude={longitude}®istrationCode={App.RegistrationCode}";
HttpClient client = new HttpClient();
var response = await client.GetStringAsync(url);
var result = Newtonsoft.Json.JsonConvert.DeserializeObject<List<WeatherInformation>>(response);
return result;
}
public async static Task<List<WeatherInformation>> GetForecastAsync(string cityName, string countryCode)
{
string url = $"http://traininglabservices.azurewebsites.net/api/weather/forecast/city?cityName={cityName}&countryCode={countryCode}®istrationCode={App.RegistrationCode}";
HttpClient client = new HttpClient();
var response = await client.GetStringAsync(url);
var result = Newtonsoft.Json.JsonConvert.DeserializeObject<List<WeatherInformation>>(response);
return result;
}
-
Open MainViewModel.cs in the "ViewModels" folder of the CoolBreeze (Portable) project. Add the following statements to the MainViewModel class to add a Forecast property to the view-model.
private ObservableCollection<WeatherInformation> _forecast;
public ObservableCollection<WeatherInformation> Forecast
{
    get { if (this._forecast == null) this._forecast = new ObservableCollection<WeatherInformation>(); return this._forecast; }
    set { this.SetProperty(ref this._forecast, value); }
}
-
Paste the following method into the MainViewModel class:
public async void RefreshForecastAsync()
{
    this.IsBusy = true;
    this.NeedsRefresh = false;

    List<WeatherInformation> results = null;

    this.Forecast.Clear();

    switch (this.LocationType)
    {
        case LocationType.Location:

            if (this.Location == null) this.Location = await Helpers.LocationHelper.GetCurrentLocationAsync();
            results = await Helpers.WeatherHelper.GetForecastAsync(this.Location.Latitude, this.Location.Longitude);
            break;
        case LocationType.City:
            results = await Helpers.WeatherHelper.GetForecastAsync(this.CityName, this.CountryCode);
            break;
    }

    foreach (var result in results)
    {
        this.Forecast.Add(result);
    }

    this.IsBusy = false;
}
-
Right-click the CoolBreeze (Portable) project and use the Add > New Item... command to add a page named ForecastPage.xaml to the project.

Adding a forecast page
-
Replace the contents of ForecastPage.xaml with the following XAML:
<?xml version="1.0" encoding="utf-8" ?>
<ContentPage xmlns="http://xamarin.com/schemas/2014/forms"
             xmlns:x="http://schemas.microsoft.com/winfx/2009/xaml" Title="{Binding CurrentConditions.DisplayName}"
             x:Class="CoolBreeze.ForecastPage">

    <Grid>
        <ListView Margin="40" ItemsSource="{Binding Forecast}" >
            <ListView.ItemTemplate>
                <DataTemplate>
                    <ViewCell>
                        <StackLayout Orientation="Horizontal">
                            <Image VerticalOptions="Center" Aspect="AspectFit" HeightRequest="40" WidthRequest="40" Source="{Binding Icon, Converter={StaticResource IconToUrlConverter}}" />
                            <Label VerticalOptions="Center" FontSize="Micro" Text="{Binding TimeStamp, Converter={StaticResource ForecastTimeLabelConverter}}" />
                            <Label FontSize="Medium" VerticalOptions="Center" Text="{Binding Conditions}" />
                            <Label VerticalOptions="Center" Text="{Binding MaxTemperaturem, Converter={StaticResource CharacterLabelConverter}, ConverterParameter=°}" />
                            <Label FontSize="Small" VerticalOptions="Center" Text="HUMIDITY: "/>
                            <Label FontSize="Small" VerticalOptions="Center" Text="{Binding Humidity, Converter={StaticResource CharacterLabelConverter}, ConverterParameter=%}" />
                        </StackLayout>
                    </ViewCell>
                </DataTemplate>
            </ListView.ItemTemplate>
        </ListView>

        <ActivityIndicator Color="{StaticResource AppAccentColor}" VerticalOptions="Center" HorizontalOptions="Center" IsRunning="{Binding IsBusy}" IsEnabled="{Binding IsBusy}" IsVisible="{Binding IsBusy}">
            <ActivityIndicator.WidthRequest>
                <OnPlatform x:TypeArguments="x:Double" iOS="100" Android="100" WinPhone="400" />
            </ActivityIndicator.WidthRequest>
        </ActivityIndicator>
    </Grid>
</ContentPage>
-
Open ForecastPage.xaml.cs and add the following method to the ForecastPage class:
protected override void OnAppearing()
{
    this.BindingContext = App.ViewModel;
    App.ViewModel.RefreshForecastAsync();
    base.OnAppearing();
}
-
Open StartPage.xaml and locate the TabbedPage.Children element.
Locating the TabbedPage.Children element
-
Add the following statements directly above the TabbedPage.Children element to add a toolbar button to the page:
<TabbedPage.ToolbarItems>
    <ToolbarItem Text="FORECAST" Order="Primary" Icon="forecast.png" Clicked="ViewForecastClicked" />
</TabbedPage.ToolbarItems>
-
Open StartPage.xaml.cs and add the following method to the StartPage class. This is the method called when a user taps the toolbar button:
private async void ViewForecastClicked(object sender, EventArgs e)
{
    await Navigation.PushAsync(new ForecastPage());
}
-
Open App.xaml.cs. In the class constructor, modify the line of code that initializes the MainPage property as shown below:
Updating the MainPage property
-
Launch the Android version of the app and tap the Forecast button in the toolbar:
Navigating to the forecast page on Android
-
Confirm that a weather forecast for the current location is displayed:

Viewing the local weather forecast
Run the iOS and Windows versions of the app, too, and compare the experiences there to the experiences on Android.
Summary
Part 2 of the Xamarin Challenge is complete. To this point, 100% of the code and XAML added to the solution is shared across all platforms. In a few days, you'll receive Part 3, in which you will add telemetry to CoolBreeze to improve its overall stability and maintainability.