Xamarin Challenge Part 3
Overview
One of the key challenges in maintaining and supporting mobile apps is understanding what users are experiencing once your app is published. No matter how perfectly you write your code, or how thorough you are about exception handling and logging, apps sometimes misbehave, and even crash. When they do, you need to know what went wrong and why. Services such as HockeyApp and Visual Studio Mobile Center make it possible to collect crash data from various devices, prioritize your actions based on the number of users seeing the crash, and get full stack traces to help you identify and fix the problem.
Beyond collecting crash data, you may want statistics regarding how many users are launching your app, where they are located, and the languages they speak. Visual Studio Mobile Center makes it easy to collect this information and more. It even allows you to integrate event tracking to collect rich behavioral analytics to understand which feature is used most often, which screens are never seen, or how users utilize in-app purchases.
Visual Studio Mobile Center brings services commonly used by mobile developers together into a single, integrated product. You can build, test, distribute, and monitor your mobile apps and easily add back-end cloud services to scale your app to serve millions of users.
In Part 3 of the Xamarin Challenge, you will enhance the CoolBreeze app that you built in Parts 1 and 2 with crash analytics and learn how to view crash analytics in Visual Studio Mobile Center. You will also have the opportunity to register to win one of two Surface Studios awarded to individuals who complete all three parts of the challenge.
Objectives
In this challenge, you will learn how to:
- Create a Visual Studio Mobile Center account
- Register an app with the Visual Studio Mobile Center
- Add crash analytics to a Xamarin Forms app
- View crash reports in Visual Studio Mobile Center
Your feedback is important. If you run into issues while working the exercises in this challenge, please contact us at xamarinchallengehelp@microsoft.com.
Prerequisites
The following are required to complete this challenge:
If you wish to build and run the iOS version of the challenge app, you also have to have a Mac running OS X 10.11 or higher, and both the Mac and the PC running Visual Studio 2017 require further configuration. For details, see https://developer.xamarin.com/guides/ios/getting_started/installation/windows/.
Exercises
This challenge includes the following exercises:
Estimated time to complete this challenge: 30 minutes.
Exercise 1: Register the app with Visual Studio Mobile Center
Before you can use Visual Studio Mobile Center to add telemetry and crash analytics to your app, you need to create a Visual Studio Mobile Center account and register the app with Visual Studio Mobile Center. In this exercise, you will create an account and then register the Android and iOS versions of CoolBreeze.
-
If you have not completed Xamarin Challenge 2, stop now and complete it before proceeding.
-
In a browser, navigate to the https://mobile.azure.com/login. Once there, click Connect with Microsoft. If you are prompted to log in, do so using your Microsoft account.
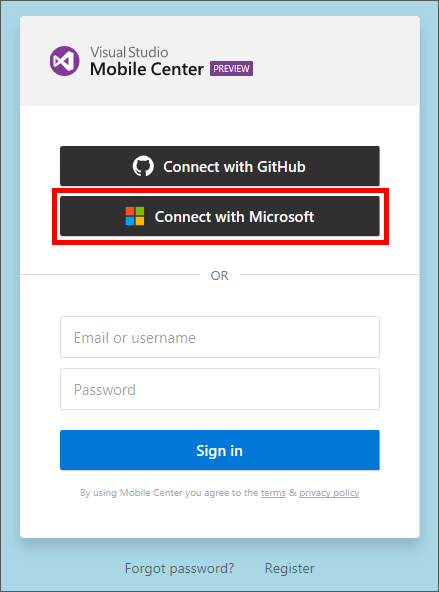
Connecting with a Microsoft account
-
Enter a user name for your Visual Studio Mobile Center account and click Save.

Choosing a user name
-
Click the profile button in the lower-left corner of the page, and then select Settings.
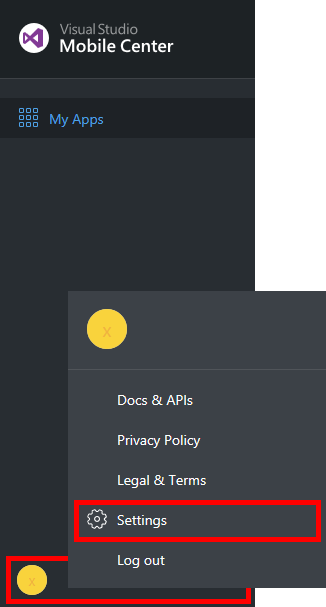
Viewing profile settings
-
Enter your preferred display name and click Update Details. Then click the browser's Back button to close the profile settings.
-
Now that you have created a Visual Studio Mobile Center account, the next step is to register the CoolBreeze app that you built for the target platforms that it supports. To begin, click Add new app.
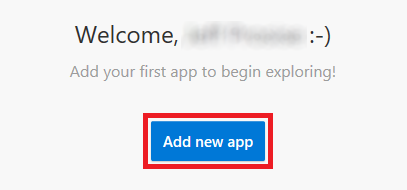
Adding a new app to Visual Studio Mobile Center
-
Enter "CoolBreeze" for the app name, and specify Android as the OS and Xamarin as the platform. Then click Add new app.
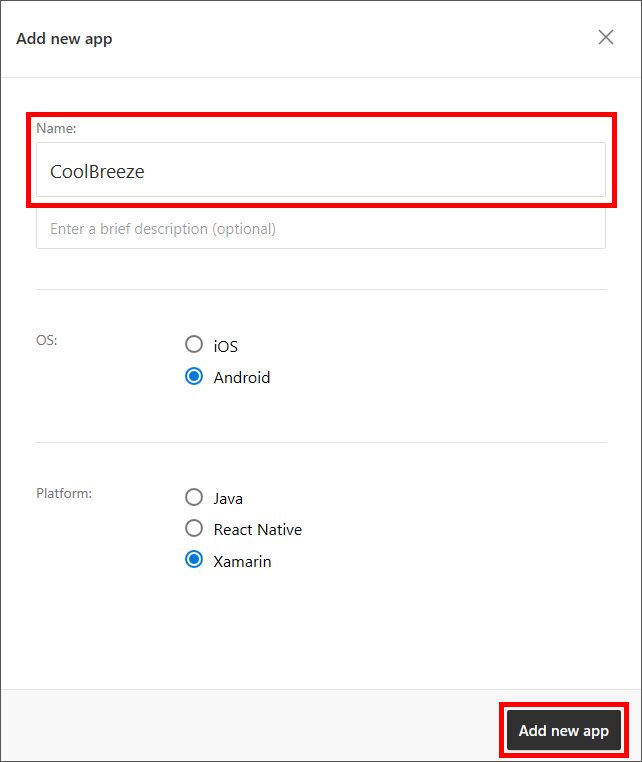
Registering the Android version of CoolBreeze
-
Click Xamarin.Forms for a summary of the steps required to add the Mobile Center SDK to your app. (This is for informational purposes only at the moment. You will make these changes in the next exercise.)

Integrating the Mobile Center SDK
-
Click the Back button in the upper-left corner of the page to navigate back to the "My Apps" page.

Navigating back to My Apps
-
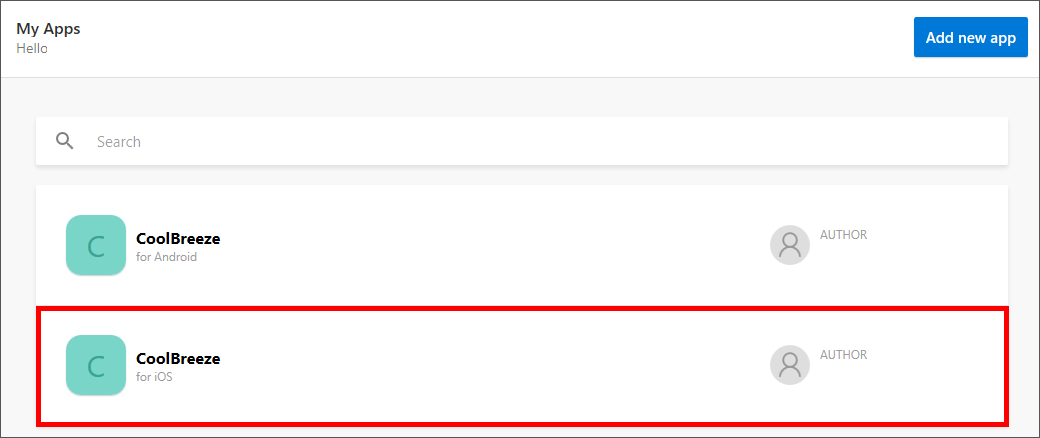
Click Add new app. Enter "CoolBreeze" for the app name, and specify iOS as the OS and Xamarin as the platform. Then click Add new app.
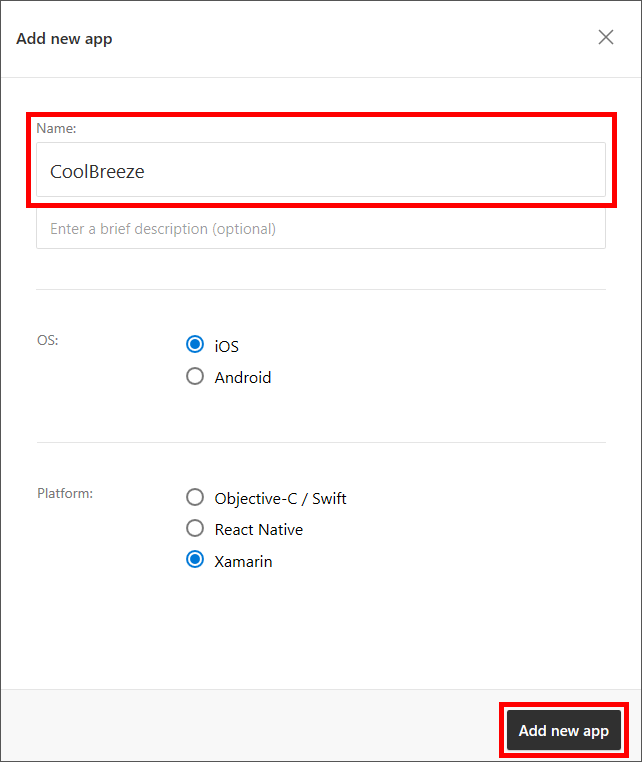
Registering the iOS version of CoolBreeze
You have now registered the Android and iOS versions of the app with Visual Studio Mobile Center. You can't register the Windows version just yet, but Windows support is coming soon.
Exercise 2: Add crash analytics support to the app
The Visual Studio Mobile Center SDK makes it easy to add logic to a Xamarin Forms app to generate crash analytics. In this exercise, you will add shared and platform-specific code to CoolBreeze to configure it so that crash information can be viewed in Visual Studio Mobile Center, and you will test your changes by temporarily adding code that generates an unhandled exception when the app starts up.
-
Open the CoolBreeze solution that you completed in Xamarin Challenge Part 2 in Visual Studio 2017.
-
In Solution Explorer, right-click the CoolBreeze solution and select Manage NuGet Packages for Solution....

Managing NuGet packages for the solution
-
Ensure that "Browse" is selected in the NuGet Package Manager, and type "Microsoft.Azure.Mobile.Analytics" (without quotation marks) into the search box. Select the Microsoft.Azure.Mobile.Analytics package. Then check the Project box to add the package to all of the projects in the solution, and click Install. When prompted to review changes, click OK.
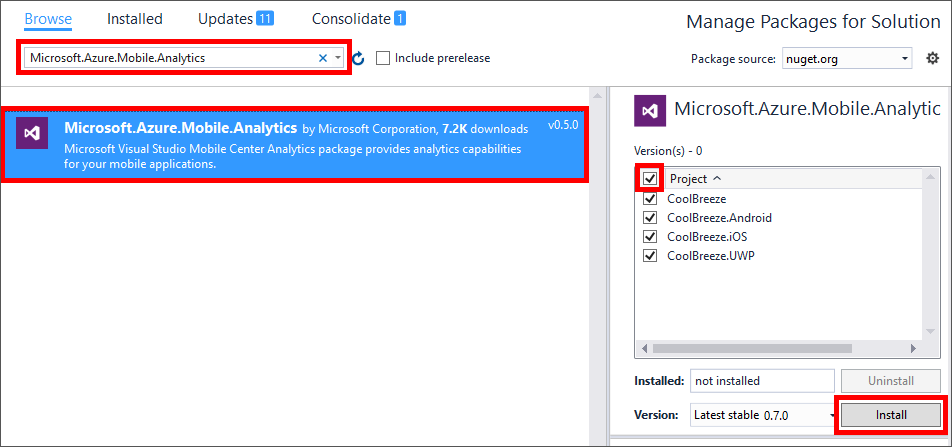
Installing Microsoft.Azure.Mobile.Analytics
-
Return to the NuGet Package Manager and once more, ensure that "Browse" is selected. Type "Microsoft.Azure.Mobile.Crashes" into the search box and select the Microsoft.Azure.Mobile.Crashes package. Then check the Project box to add the package to all of the projects in the solution, and click Install. When prompted to review changes, click OK.
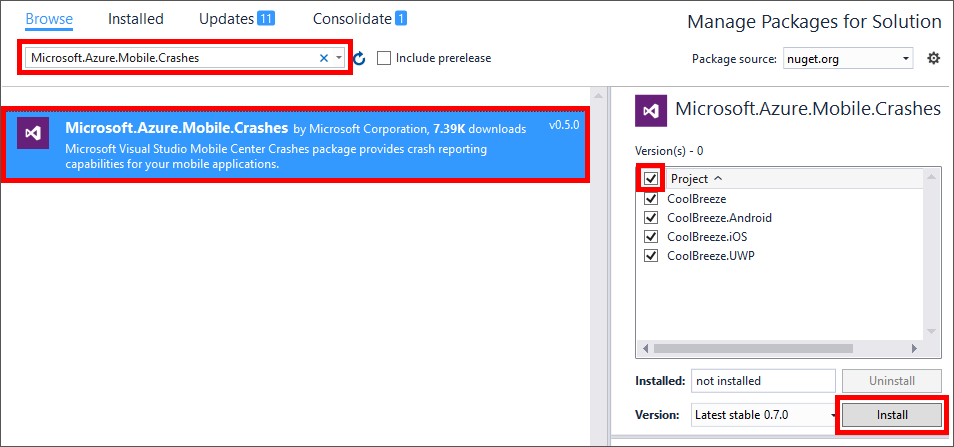
Installing Microsoft.Azure.Mobile.Crashes
-
In Solution Explorer, open the App.xaml.cs file in the CoolBreeze (Portable) project.
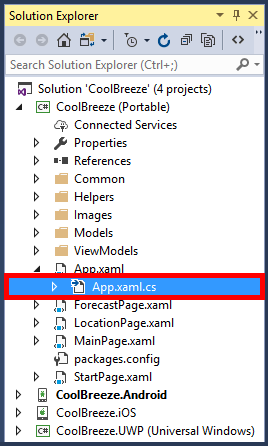
Opening App.xaml.cs
-
Add the following statements at the top of the file:
using Microsoft.Azure.Mobile;
using Microsoft.Azure.Mobile.Analytics;
using Microsoft.Azure.Mobile.Crashes;
-
Add the following statement to the OnStart method:
MobileCenter.Start(typeof(Analytics), typeof(Crashes));
-
In Solution Explorer, open the MainActivity.cs file in the CoolBreeze.Android project.
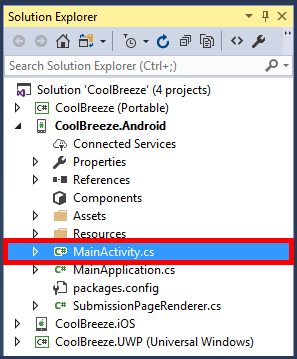
Opening MainActivity.cs
-
Add the following statement to the OnCreate method, right before the call to LoadApplication:
Microsoft.Azure.Mobile.MobileCenter.Configure("ANDROID_APP_SECRET");
-
Return to the Visual Studio Mobile Center app portal in your browser and click CoolBreeze for Android.
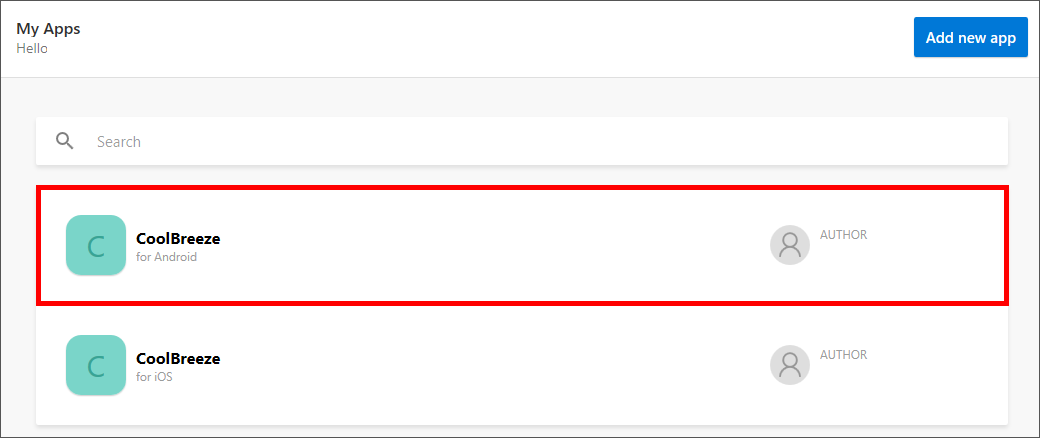
Opening CoolBreeze for Android in the portal
-
Click Manage App in the upper-right corner of the page.

Managing the app
-
Copy the value in the App secret box to the clipboard.
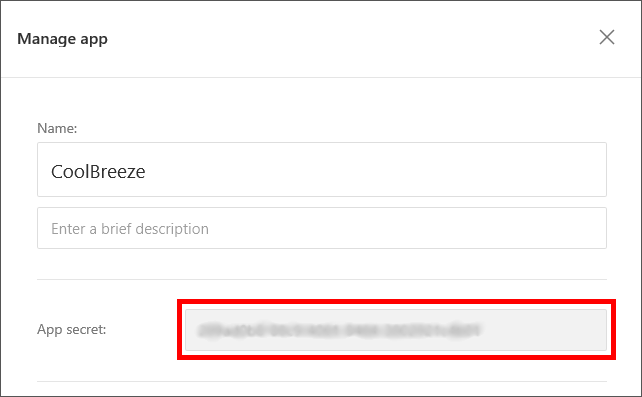
Copying the app secret
-
Return to MainActivity.cs in Visual Studio and replace "ANDROID_APP_SECRET" with the value on the clipboard.

Adding the app secret to MainActivity.cs
-
Open the AppDelegate.cs file in the CoolBreeze.iOS project.
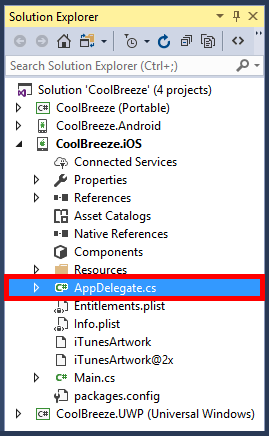
Opening AppDelegate.cs
-
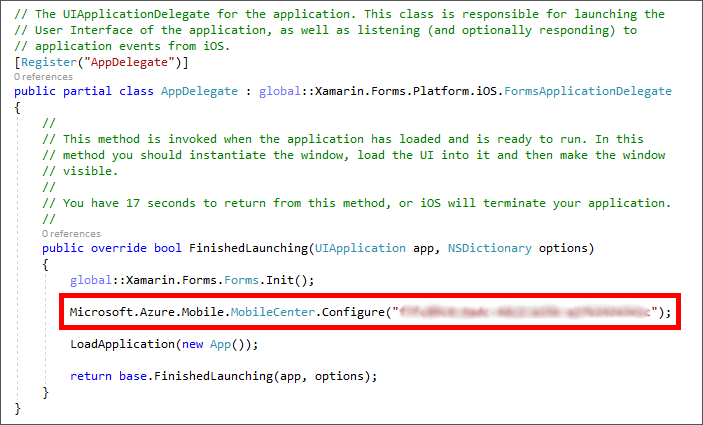
Add the following statement to the FinishedLaunching method, right before the call to LoadApplication:
Microsoft.Azure.Mobile.MobileCenter.Configure("IOS_APP_SECRET");
-
Return to the "My Apps" page in the Visual Studio Mobile Center app portal and click CoolBreeze for iOS.
Opening CoolBreeze for iOS in the portal
-
Click Manage App in the upper-right corner of the page.
Managing the app
-
Copy the value in the App secret box to the clipboard.
Copying the app secret
-
Return to AppDelegate.cs in Visual Studio and replace "IOS_APP_SECRET" with the value on the clipboard.
Adding the app secret to AppDelegate.cs
-
Now it's time generate a crash report and see how it looks in Visual Studio Mobile Center. To do that, you will temporarily add code to the app to generate a crash. Begin by opening the file named StartPage.xaml.cs in the CoolBreeze (Portable) project.
-
Add the following statement to the InitializeAppAsync method in the StartPage class:
DateTime badDateTime = DateTime.Parse("This is not a date or time");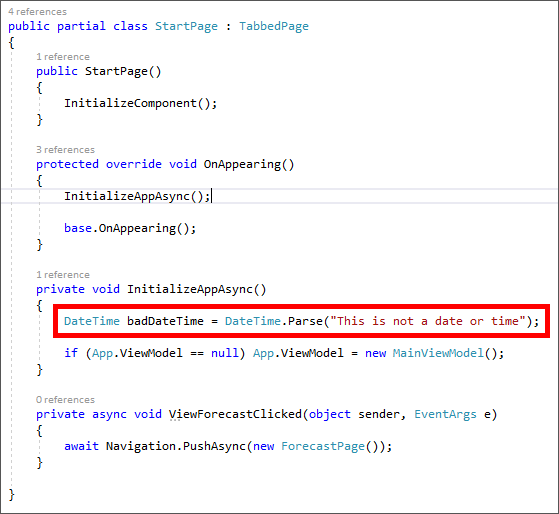
Generating a crash in InitializeAppAsync
-
In Solution Explorer, right-click the CoolBreeze.Android project and select Set as StartUp Project.

Making CoolBreeze.Android the startup project
-
Click the Run button to launch CoolBreeze in the selected Android emulator.

Launching the Android version of the app
-
Confirm that shortly after the app loads in the emulator, an unhandled exception is thrown.
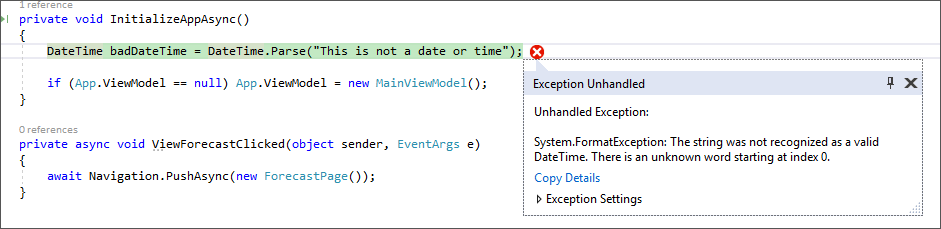
Result of an unhandled exception
-
Crash data is initially stored on the local device, and is typically transmitted to Visual Studio Mobile Center the next time the app loads. In Visual Studio, return to StartPage.xaml.cs and remove the line of code that generates the unhandled exception.

Fixing the code
-
Use Visual Studio's Debug > Start Without Debugging command (or simply press CTRL+F5) to launch the app without the debugger attached.
Crash data does not get transmitted to Visual Studio Mobile Center if the debugger is attached.
-
Return to the Visual Studio Mobile Center in your browser and open CoolBreeze for Android.
Opening CoolBreeze for Android in the portal
-
Click Crashes.
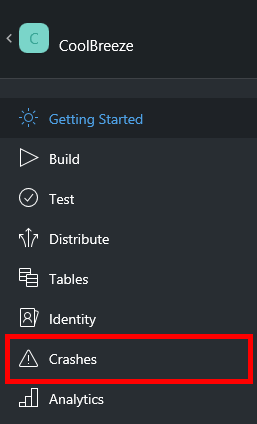
Viewing crash reports
-
Observe the various charts displaying crash information, as well as the entry at the bottom of the page representing the crash that you generated moments ago. Note that the crash may not appear in the portal for 10 minutes or so. If it's not there, proceed with Exercise 3 of this challenge and return to the crash reports later.

Crash reporting in Visual Studio Mobile Center
Having near real-time crash analytics available is important for any mobile app, but Visual Studio Mobile Center isn't limited to crash reports. It also offers services for continuous integration and automated testing and distribution of your app, and it provides information about real-world usage. Moreover, it provides back-end services for authentication, data syncing, and (soon) push notifications, making it a one-stop solution for building mobile apps that you can maintain and scale. For more information, see https://docs.microsoft.com/en-us/mobile-center/.
Exercise 3: Submit your work and register for the prize drawing
If you have gotten this far, you have successfully completed all three parts of the Xamarin Challenge. As a reward for your hard work, you now have an opportunity to submit your completed app for a chance to win a brand new Surface Studio! In this exercise, you will add a page to CoolBreeze that lets you submit your work. Then you will run the app and use it to register for the prize drawing.
-
In Solution Explorer, right-click the CoolBreeze solution and select Manage NuGet Packages for Solution….
Managing NuGet packages for the solution
-
Ensure that "Browse" is selected in the NuGet Package Manager, and type "WindowsAzure.Storage" into the search box. Select the WindowsAzure.Storage package. Then check the Project box to add the package to all of the projects in the solution, and click Install. When prompted to review changes, click OK. If prompted to accept a license, click I Accept.
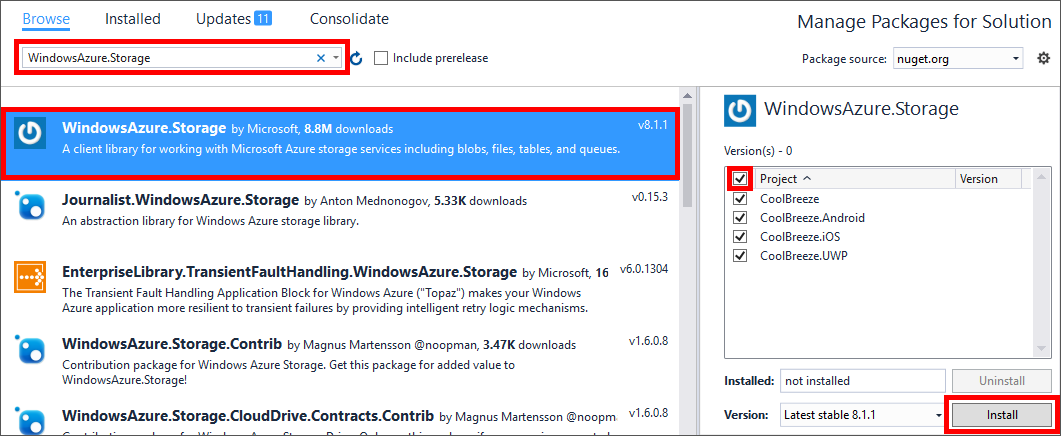
Installing WindowsAzure.Storage
-
In Solution Explorer, right-click the CoolBreeze (Portable) project and select Add > New Item.... Then select Forms Blank Content Page Xaml, specify "SubmissionPage.xaml" as the name, and click Add.
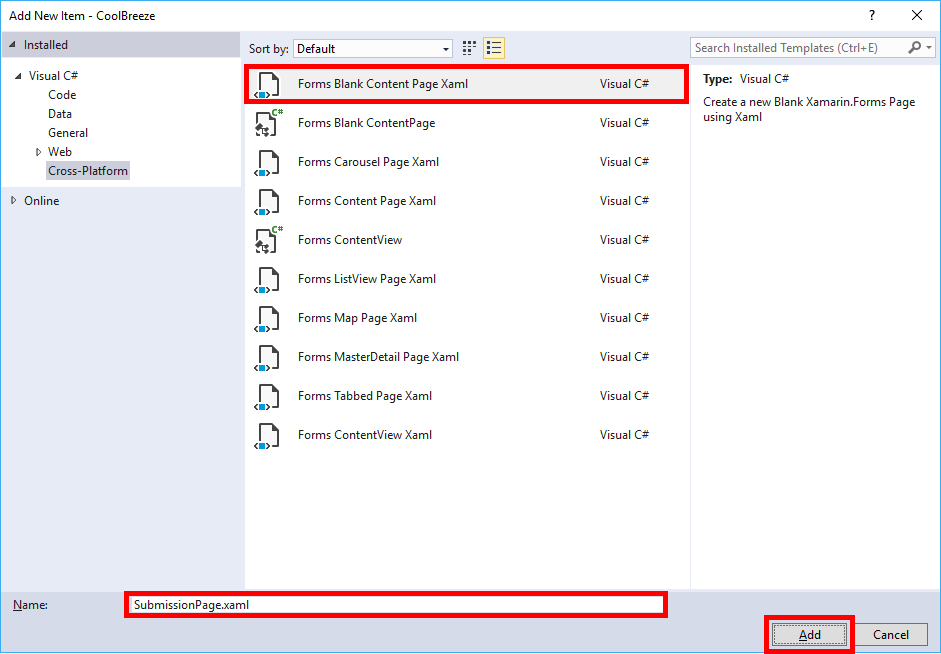
Adding a submission page
-
Replace the contents of SubmissionPage.xaml with the following XAML:
<?xml version="1.0" encoding="utf-8" ?>
<ContentPage xmlns="http://xamarin.com/schemas/2014/forms" Title="Submit"
             xmlns:x="http://schemas.microsoft.com/winfx/2009/xaml"
             x:Class="CoolBreeze.SubmissionPage">

    <Grid>
        <StackLayout IsVisible="{Binding ChallengeSubmission.IsSubmitted, Converter={StaticResource BooleanToFalseConverter}}" Margin="30,20">
            <Image HorizontalOptions="Start" WidthRequest="72" HeightRequest="72" Source="icon.png"/>
            <Label VerticalOptions="Center" FontSize="Large" Text="Submit Challenge" />
            <Label FontSize="Medium" Text="Congratulations! Now that you've completed your final Xamarin app development challenge, you can now submit your solution to be entered to win a Surface Studio!" />
            <Label FontAttributes="Bold" IsVisible="{Binding ChallengeSubmission.IsAuthenticated}" FontSize="Medium" Text="Tap 'Submit my solution' to submit your solution." />
            <Button WidthRequest="200" TextColor="White" BackgroundColor="{StaticResource AppAccentColor}" HorizontalOptions="Start" Text="Submit my solution" Command="{Binding ChallengeSubmission.SubmitChallengeCommand}"/>
        </StackLayout>

        <StackLayout IsVisible="{Binding ChallengeSubmission.IsSubmitted}" Margin="30,20">
            <Image HorizontalOptions="Start" WidthRequest="72" HeightRequest="72" Source="icon.png"/>
            <Label VerticalOptions="Center" FontSize="Large" Text="Submission Complete" />
            <Label Margin="0,30" FontSize="Medium" Text="Congratulations! Your projects have been submitted successfully to the Xamarin Challenge Gods!" />
        </StackLayout>

        <ActivityIndicator Color="{StaticResource AppAccentColor}" VerticalOptions="Center" HorizontalOptions="Center" IsRunning="{Binding IsBusy}" IsEnabled="{Binding IsBusy}" IsVisible="{Binding IsBusy}">
            <ActivityIndicator.WidthRequest>
                <OnPlatform x:TypeArguments="x:Double" iOS="100" Android="100" WinPhone="400" />
            </ActivityIndicator.WidthRequest>
        </ActivityIndicator>
    </Grid>
</ContentPage>
-
Open SubmissionPage.xaml.cs and replace its contents with the following code:
using System;
using System.Collections.Generic;
using System.Linq;
using System.Text;
using System.Threading.Tasks;

using Xamarin.Forms;

namespace CoolBreeze
{
    public partial class SubmissionPage : ContentPage
    {
        public SubmissionPage()
        {
            InitializeComponent();
        }

        protected override void OnAppearing()
        {
            this.BindingContext = App.ViewModel;
            base.OnAppearing();
        }
    }
}
-
Right-click the "Models" folder in the CoolBreeze (Portable) project and use the Add > Class command to add a class file named "SubmissionInformation.cs." Then replace the contents of the file with the following code:
using CoolBreeze.Common;
using Microsoft.WindowsAzure.Storage.Blob;
using System;
using System.Threading.Tasks;

namespace CoolBreeze
{
    public class SubmissionInformation : Common.ObservableBase
    {
        private bool _isBusy;
        public bool IsBusy
        {
            get { return this._isBusy; }
            set { this.SetProperty(ref this._isBusy, value); }
        }

        private bool _isSubmitted;
        public bool IsSubmitted
        {
            get { return this._isSubmitted; }
            set { this.SetProperty(ref this._isSubmitted, value); }
        }

        public string SubmissionIcon
        {
            get { return "key"; }
        }

        private string _submitLabel;
        public string SubmitLabel
        {
            get { return this._submitLabel; }
            set { this.SetProperty(ref this._submitLabel, value); }
        }

        private bool _canSubmit() => (Microsoft.Azure.Mobile.MobileCenter.InstallId.HasValue);

        private string _submissionLocation = "https://traininglabs.blob.core.windows.net/challenge-submissions?sv=2015-12-11&si=challenge-submissions-15AA6639B2C&sr=c&sig=lRYUs6%2FdEc3BfEMkKLlUtVOLeYuUhb%2F2juyVP1ms6UY%3D";
        private string _registrationLocation = $"http://traininglabservices.azurewebsites.net/api/weather/register?registrationCode={App.RegistrationCode}";

        public System.Windows.Input.ICommand SubmitChallengeCommand
        {
            get
            {
                return new RelayCommand(async () =>
                {
                    this.IsBusy = true;

                    await SubmitChallengeAsync(App.RegistrationCode);

                    this.IsSubmitted = true;
                    this.IsBusy = false;

                }, _canSubmit);
            }
        }

        public async Task<bool> SubmitChallengeAsync(string registrationCode)
        {
            bool successful = false;

            CloudBlobContainer container = new CloudBlobContainer(new Uri(_submissionLocation));

            var blob = container.GetBlockBlobReference($"{App.RegistrationCode}.submission");

            try
            {
                var finalSubmission = new
                {
                    InstallId = Microsoft.Azure.Mobile.MobileCenter.InstallId.ToString(),
                    RegistrationCode = App.RegistrationCode,
                };

                await blob.UploadTextAsync(Newtonsoft.Json.JsonConvert.SerializeObject(finalSubmission));

                successful = true;
            }
            catch (Exception ex)
            {
            }

            return successful;
        }

        public async void RegisterAsync(string registrationCode)
        {
            System.Net.Http.HttpClient client = new System.Net.Http.HttpClient();

            await client.PostAsync(_registrationLocation, null);
        }
    }

}
-
Open MainViewModel.cs in the "ViewModels" folder and replace the class constructor with the following code:
public MainViewModel()
{
    this.IsBusy = true;
    this.NeedsRefresh = true;
    this.LocationType = LocationType.City;
    this.CurrentConditions = new WeatherInformation();
    this.Forecast = new ObservableCollection<WeatherInformation>();

    this.ChallengeSubmission = new SubmissionInformation()
    {
        IsSubmitted = false,
    };

    this.ChallengeSubmission.RegisterAsync(App.RegistrationCode);
}

private SubmissionInformation _challengeSubmission;
public SubmissionInformation ChallengeSubmission
{
    get { return this._challengeSubmission; }
    set { this.SetProperty(ref this._challengeSubmission, value); }
}
-
Open StartPage.xaml in the CoolBreeze (Portable) project. Locate the TabbedPage.ToolbarItems element and add the following ToolbarItem declaration before the ToolbarItem declaration that is already there:
<ToolbarItem Text="SUBMIT CHALLENGE" Order="Primary" Clicked="ViewSubmitChallengeClicked" />
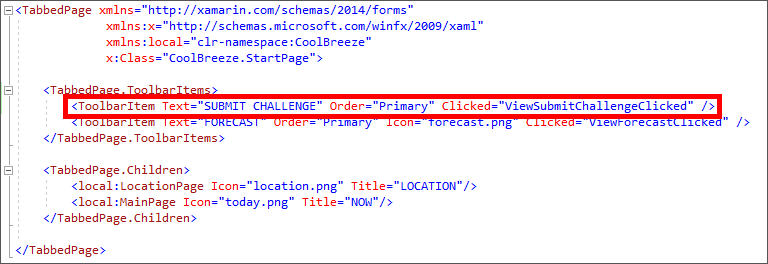
Updating StartPage.xaml
-
Open StartPage.xaml.cs and add the following method to the StartPage class:
private async void ViewSubmitChallengeClicked(object sender, EventArgs e)
{
    await Navigation.PushAsync(new SubmissionPage());
}
-
Now it's time to run the app and submit your work. Launch the app and click SUBMIT CHALLENGE.
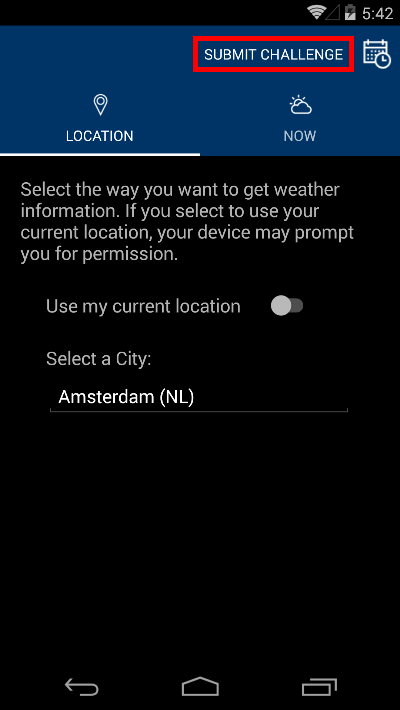
Submitting your work
-
Click SUBMIT MY SOLUTION to submit your solution and register to win a Surface Studio.
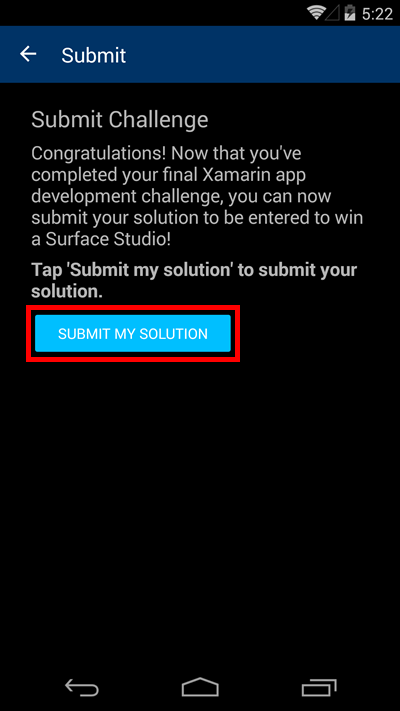
Submitting your solution
-
Confirm that CoolBreeze reports that your submission is complete.
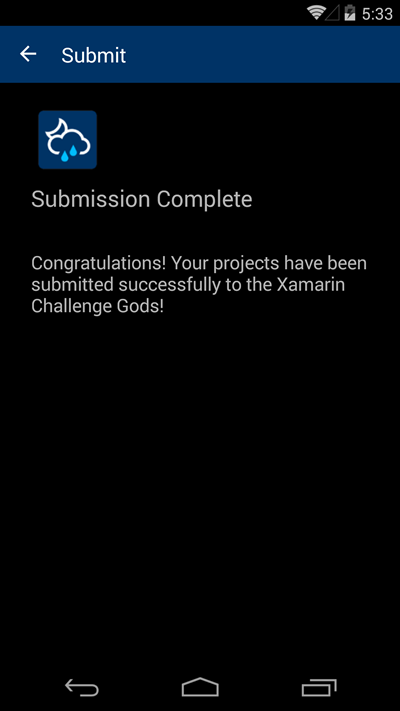
A successful submission
Congratulations! Your entry has been submitted. Good luck with the prize drawing. And enjoy building cross-platform mobile apps with Visual Studio 2017, Xamarin Forms, and Visual Studio Mobile Center.